
NOTE
This function allows you to convert bulk transactions into individual E-invoice, consolidated E-invoice, individual self-billed E-invoice or consolidated self-billed E-invoice.
Step by step tutorial to convert transactions to invoice
1. You may proceed to Accounting > Transactions located at the side menu.

2. Click on the button Convert Invoice.
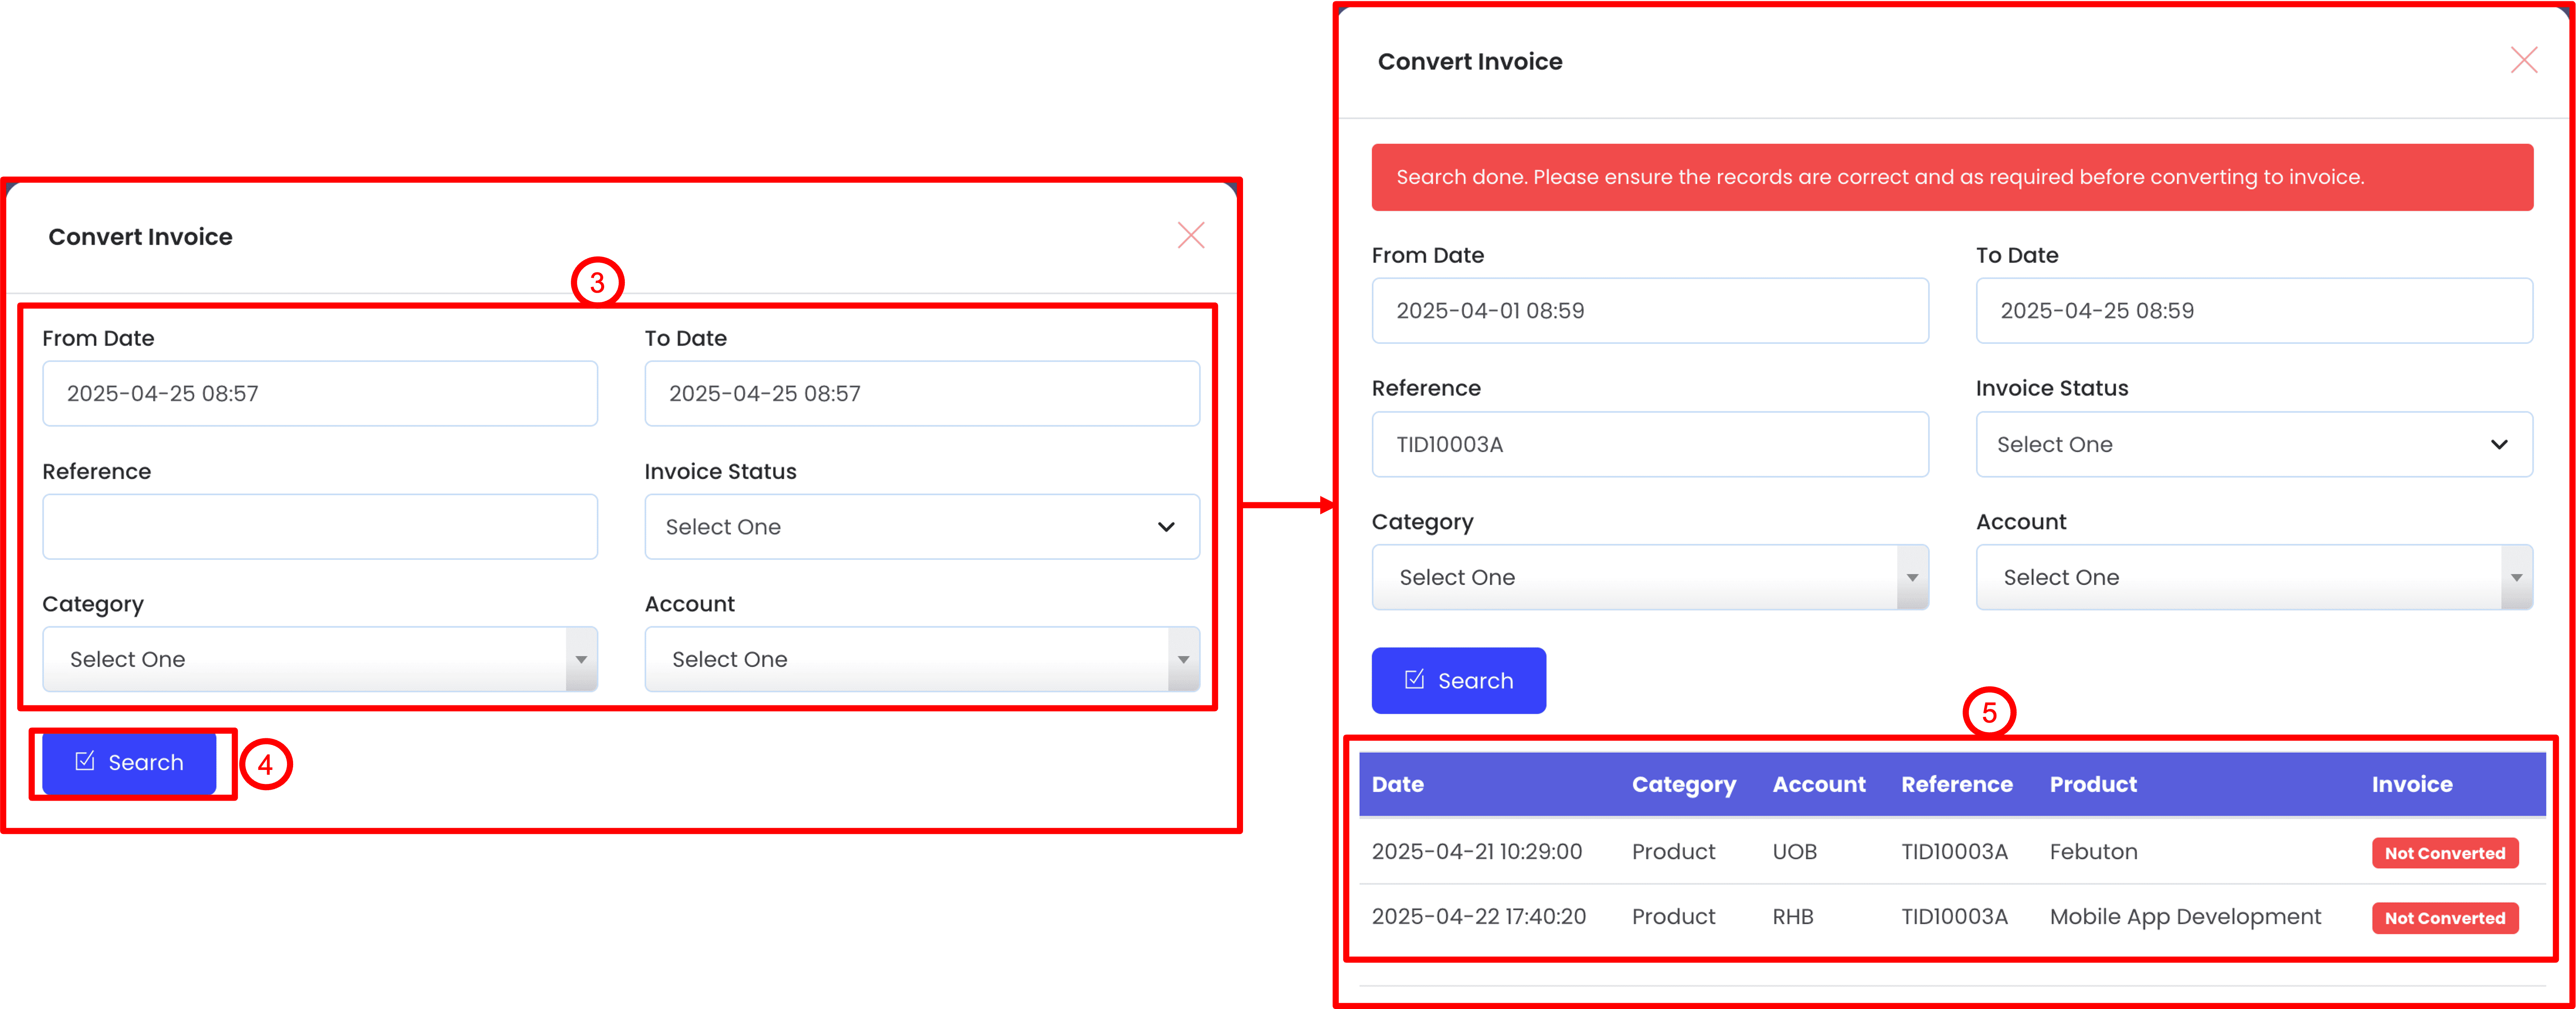
3. Use the fields to filter your transaction records, for example, filter your transaction records by date range and reference number (transaction ID).
4. Click on Search to start filtering your transaction records.
5. The results will be shown in a table here, you may double check the returned results and make sure the transaction records filtered are correct before proceeding to convert them into invoice.
NOTE
Only transaction records with status Not Converted will be used and affected in the invoice conversion.

6. Then, scroll down to the form below. Fill in the form accordingly and click on Convert Invoice to convert the filtered transaction records into invoice document.
a. Target
In this dropdown, you can select whether you wish to convert the transactions into
- Consolidated Invoice,
- Consolidated Purchase (Consolidated Self-Billed Invoice)
- or to Individual Invoice for a specific customer
- or to an Individual Self-Billed Invoice for a specific vendor
Once you select a target, our system will automatically format your transactions and convert to respective document that fulfills LHDN E-invoicing standards.
b. Invoice Template
This field is compulsory, you are required to create an invoice template beforehand in respect to the selected target in (a). For example, if your target is to create a Consolidated Invoice, please do make sure that you have an invoice template with type Consolidated Invoice being created first before moving on to this step. To understand more about Invoice Templates, please refer to this tutorial.
c. Linking Invoice
This field is only applicable when you are trying to convert the transactions into Credit Note, Debit Note, Refund Note, Self-Billed Credit Note, Self-Billed Debit Note or Self-Billed Refund Note.
This is because these documents are meant to refer to a specific invoice document that is being issued earlier to correct the mistakes of the issued invoice document.
d. Invoice Number / Bill No
If you are converting to an invoice, Invoice Number will be used.
Else if you are converting to a purchase (self-billed invoice), Bill No will be used.
You may make use of the Accent system's invoice running number feature so that you will not need to keep track the latest invoice number as we will automatically fill in for you.
To learn more on invoice running number and setup, please refer to this tutorial.
7. After converting the transactions to invoice, the page will be refreshed and the records that are previously selected and marked as Not Converted will now updated to the Invoice Number / Bill No, which indicates that the conversion is successful. Click on View Invoice to view the details of the newly converted invoice.
NOTE
Until this step, the newly converted invoice is still not submitted to MyInvois Portal (LHDN server) yet. This is to avoid human mistakes during invoice conversion process and duplicate entries.

8. If you refer to the section Sales > Invoices, you can also find that the newly converted invoice record listed in the table too.

9. When you reach the details page of the newly converted invoice, click on Resubmit (a) to submit the invoice record to MyInvois Portal (LHDN server). Then click on Validate (b) to make sure the invoice record being submitted to LHDN server is accepted and valid.

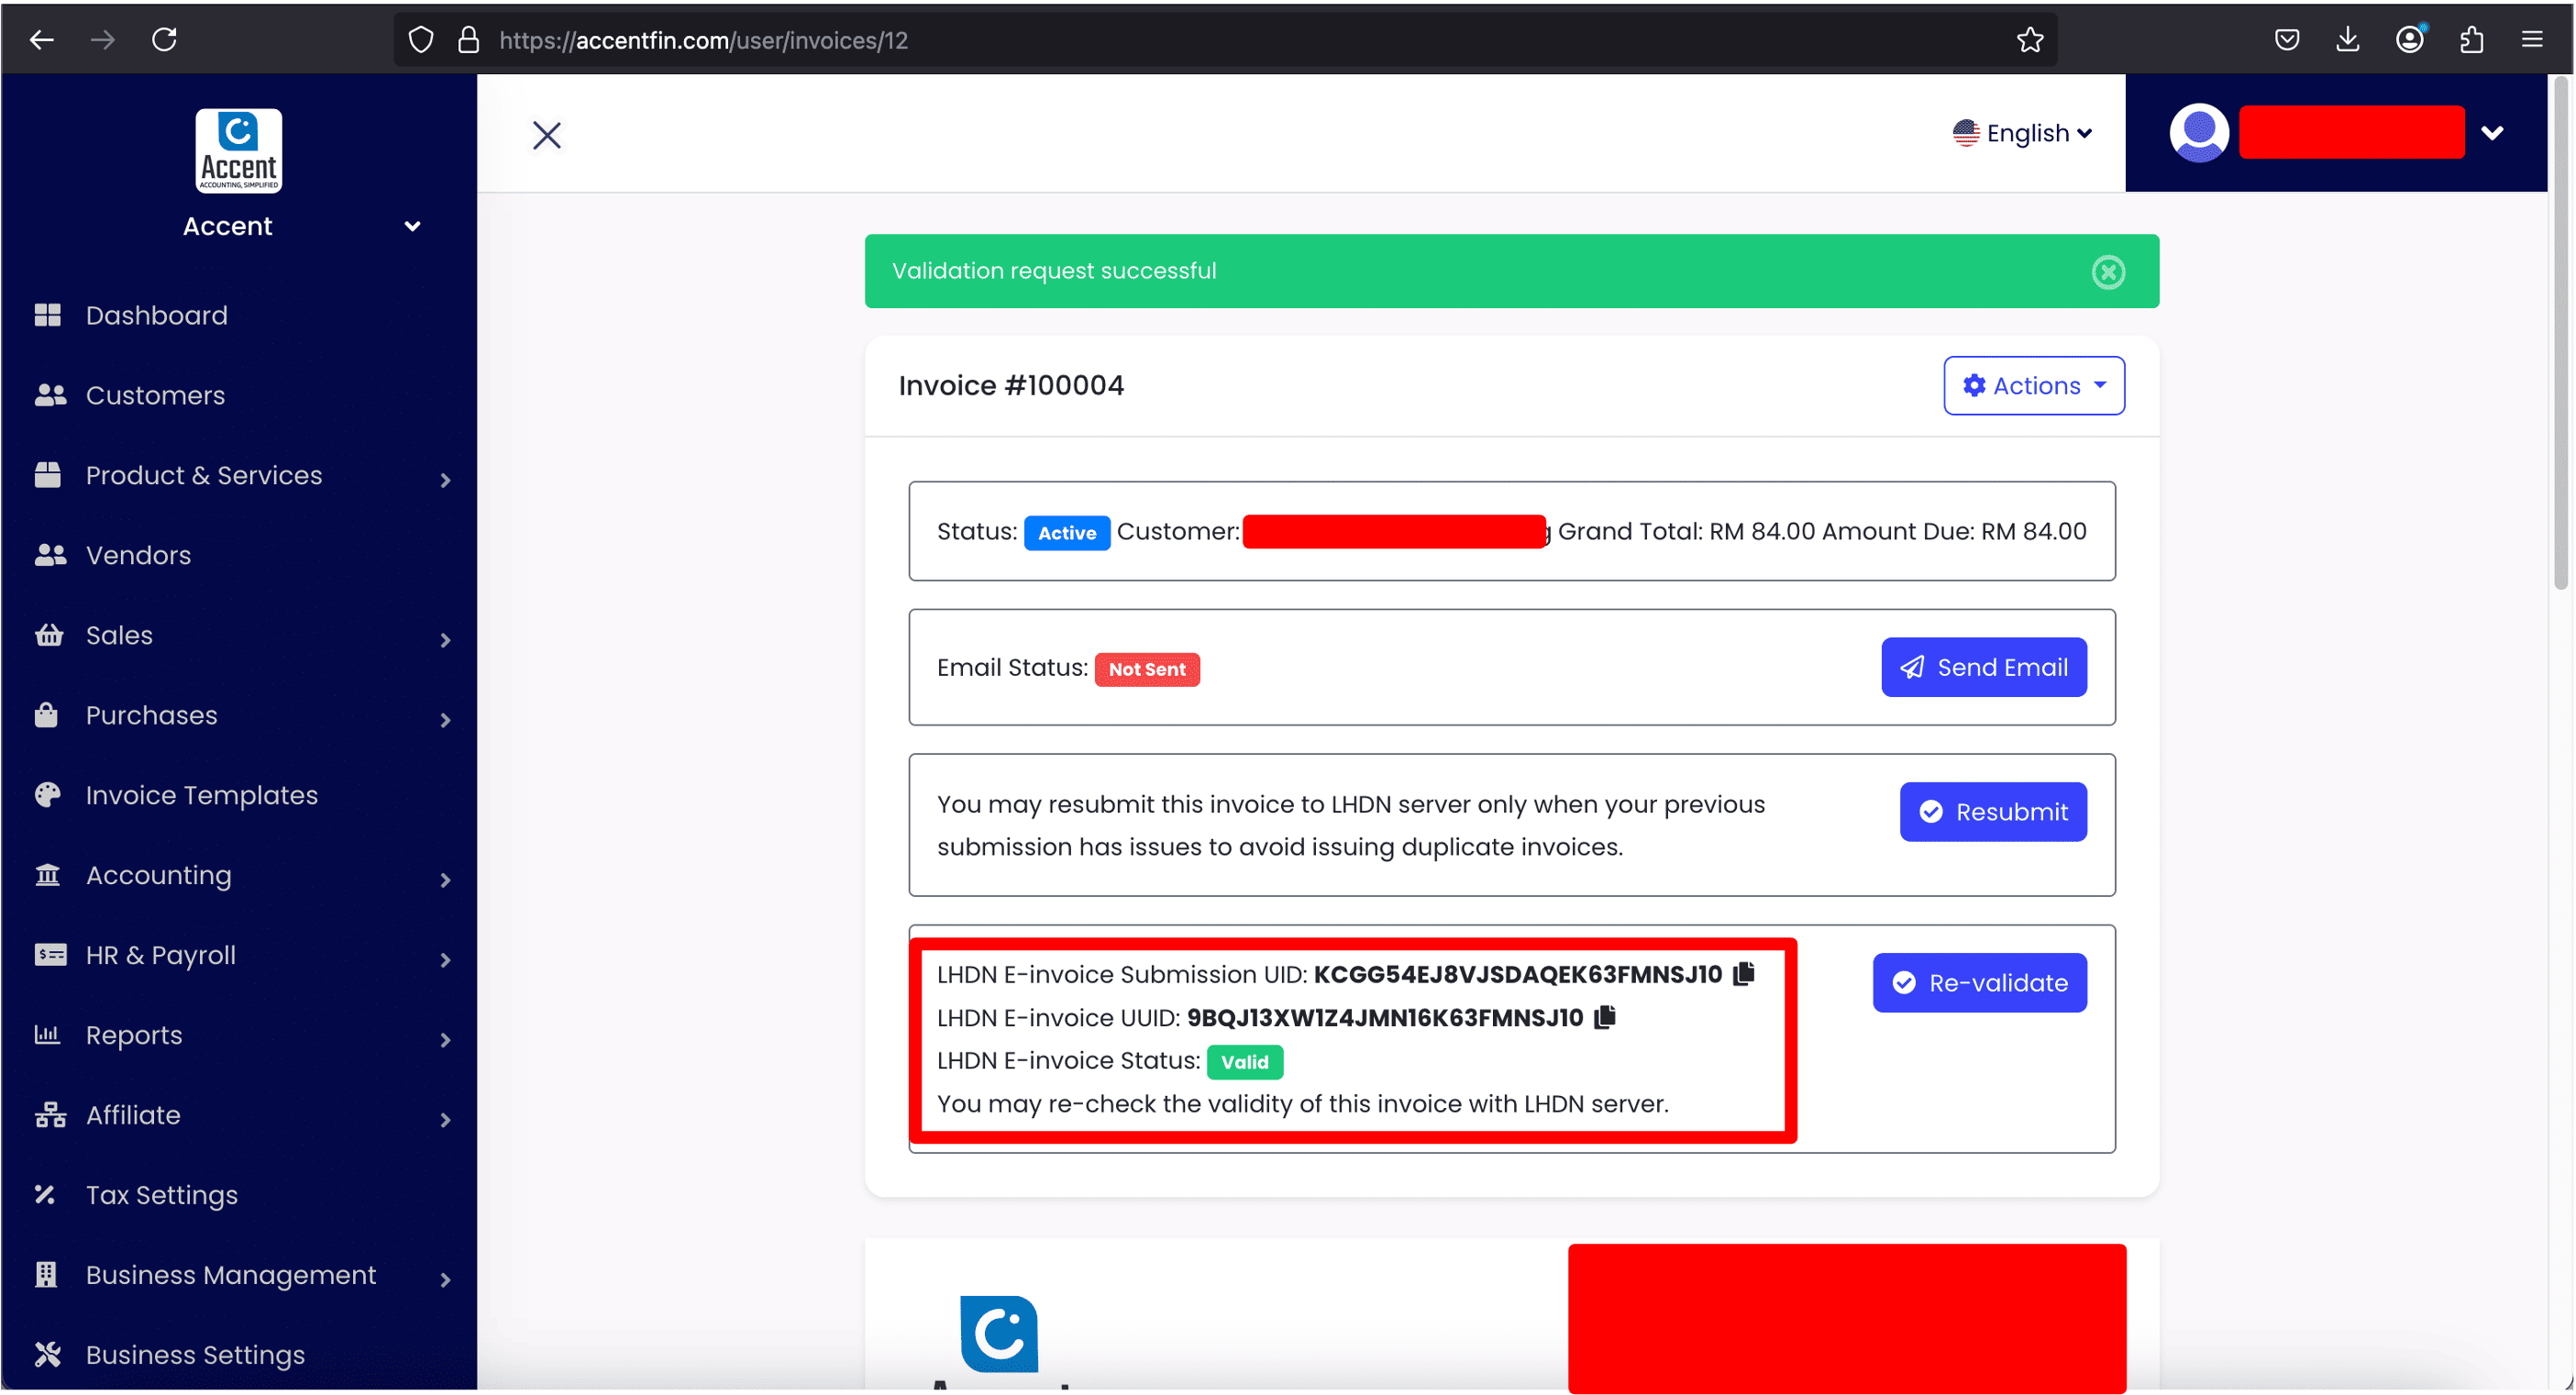
10. Once the invoice record is validated, you will be able to see and copy the E-invoice Submission UID and E-invoice UUID of the invoice record (for your reference). Then, you can freely share this invoice to your customer.
Comments (0)