
NOTE
This tutorial guides on how to enable the E-invoice Requesting Form for your customers to request E-invoice on their own so that you will not need to issue E-invoice one by one to your customers. Save time!
Step by step tutorial to enable E-invoice Requesting Form
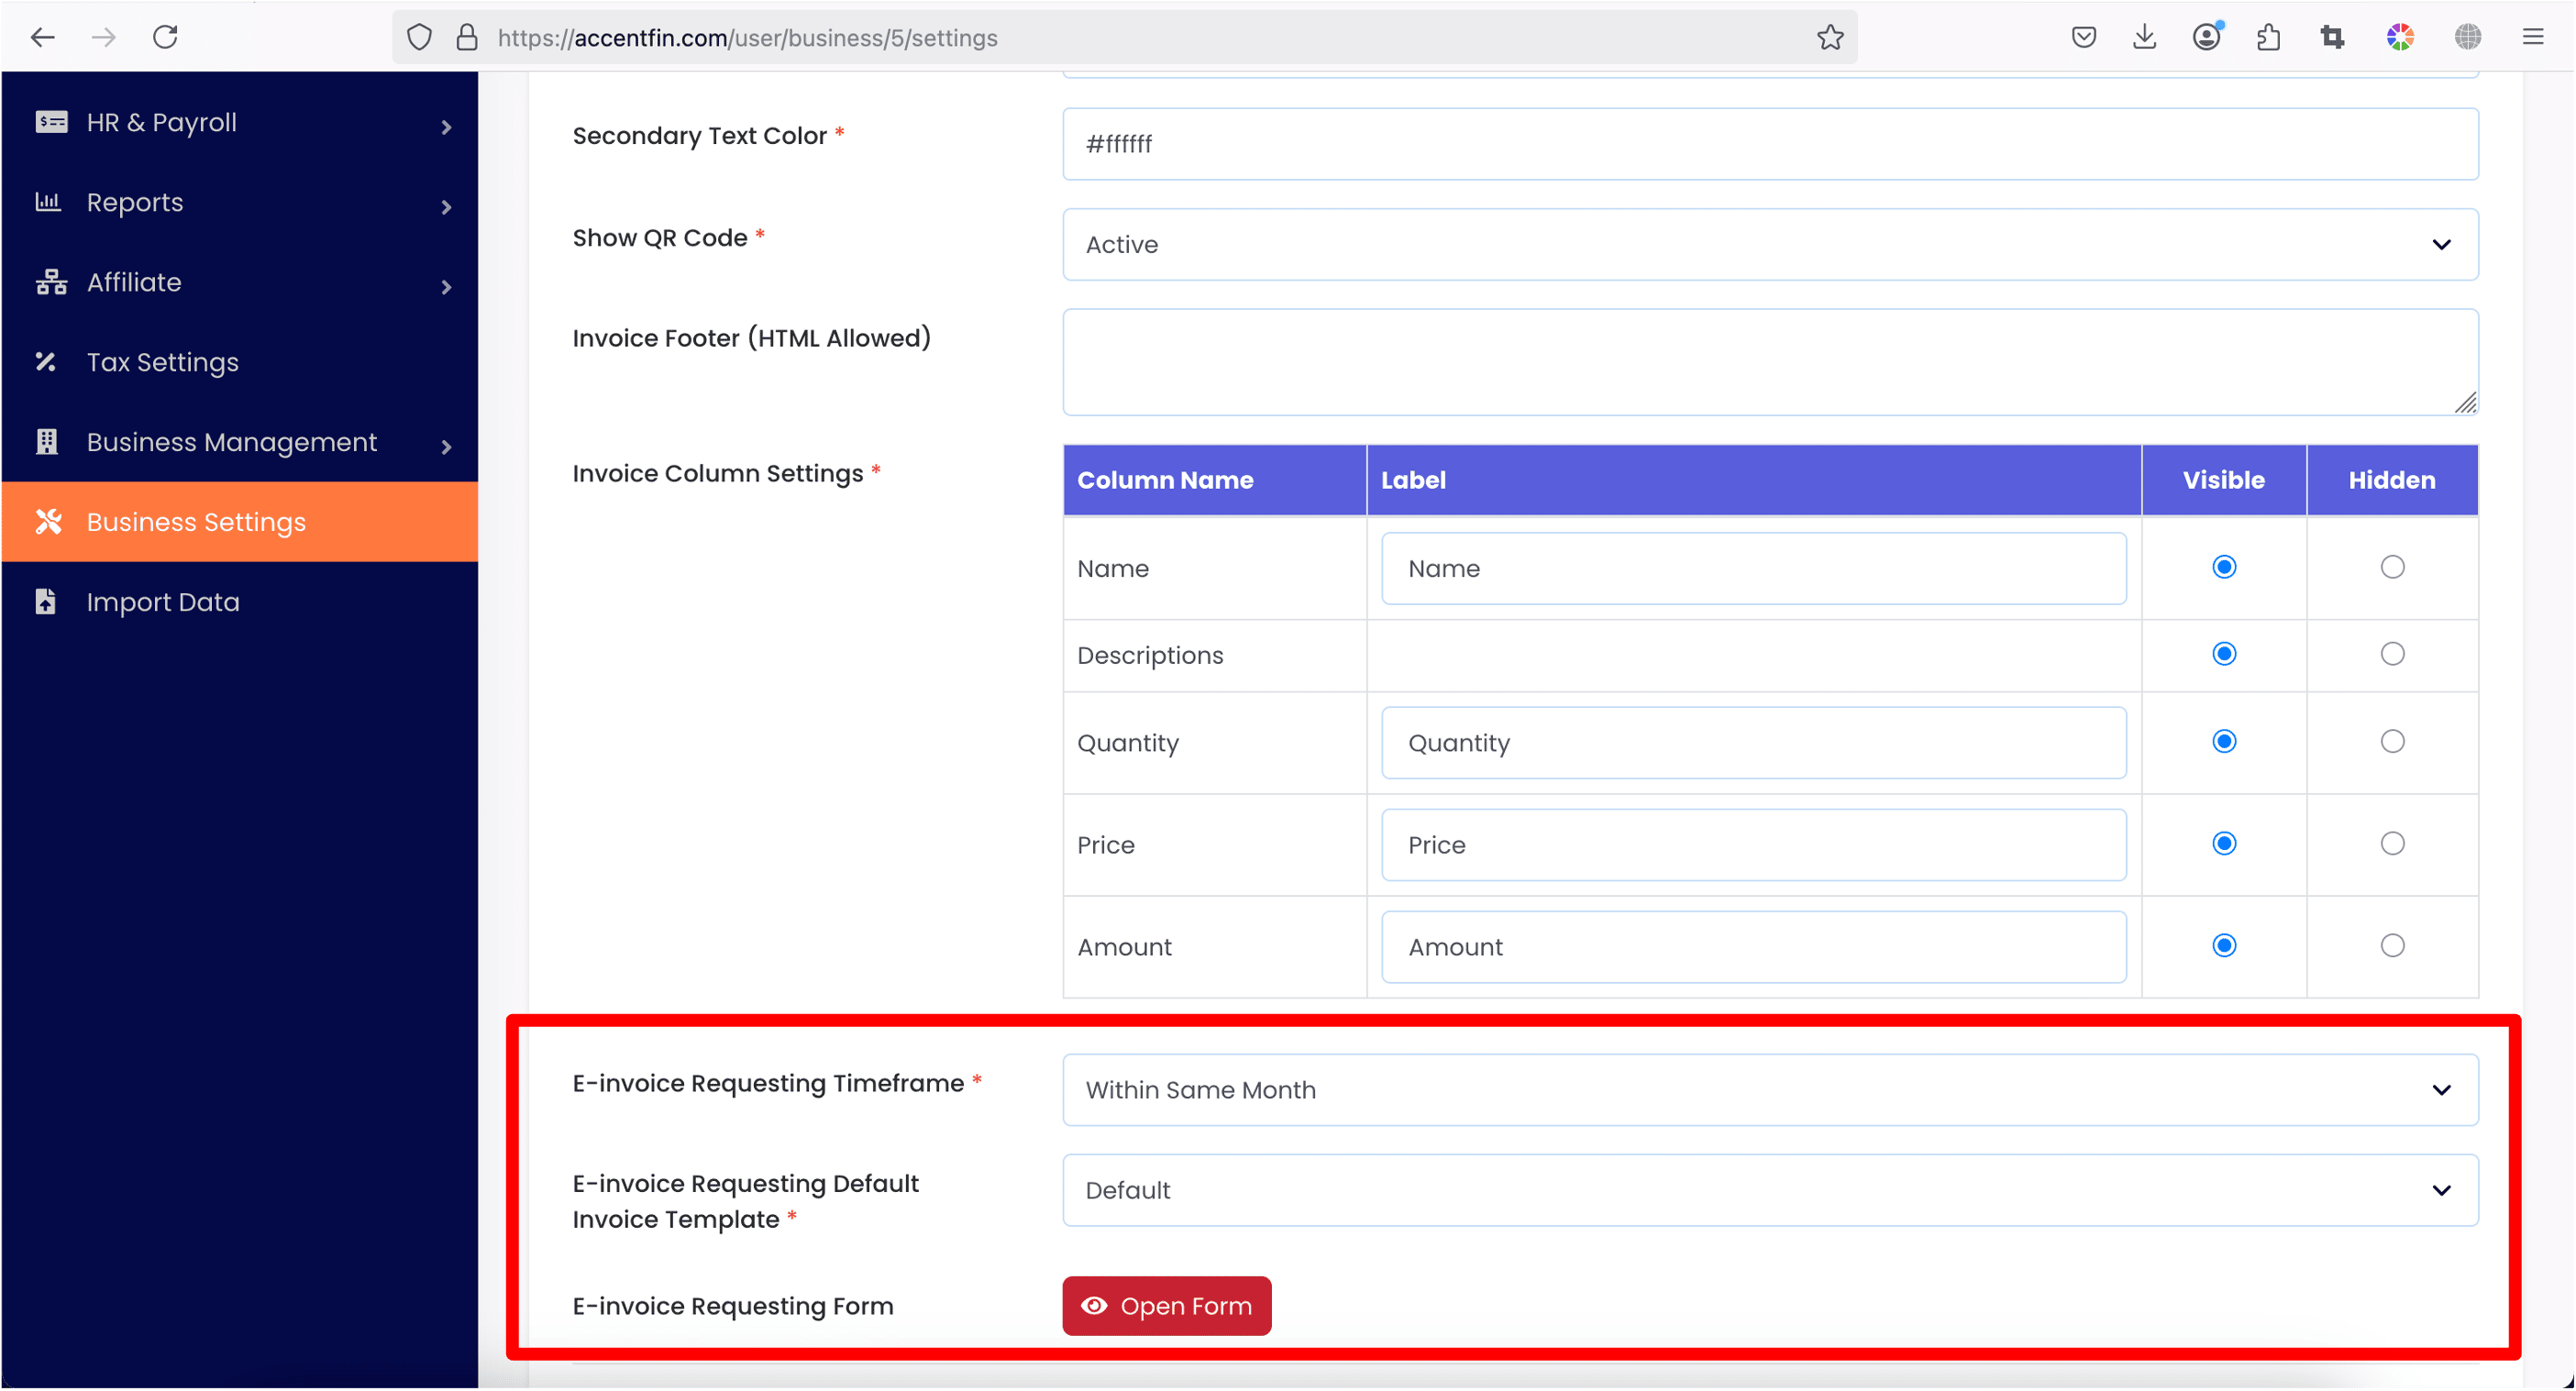
1. You may proceed to Business Settings located at the side menu. Then click on Invoice Settings located at the top bar. Scroll further down until you reach the settings for E-invoice Requesting Form.

2. Change the settings based on your business's needs.
- E-invoice Requesting Timeframe: Setup the maximum available period for your customers to request E-invoice from you. For example, within same month means that your customers can only request E-invoice for transactions that occurs within the same month and not in other months. Available options include "within same month" and ranges from "1 day" to "31 days".
- E-invoice Requesting Default Invoice Template: This invoice template defines the layout of the invoice issued to your customers. Invoice template should show your company's identity and aligns with your business theme. Learn more about invoice template by referring to this tutorial.
- E-invoice Requesting Form: Click on Open Form to open your business's E-invoice Requesting Form, once the page is opened, you can share the page / link to your customers or convert the page link to a QR code and print it in your receipt for your customers to request E-invoice from you.
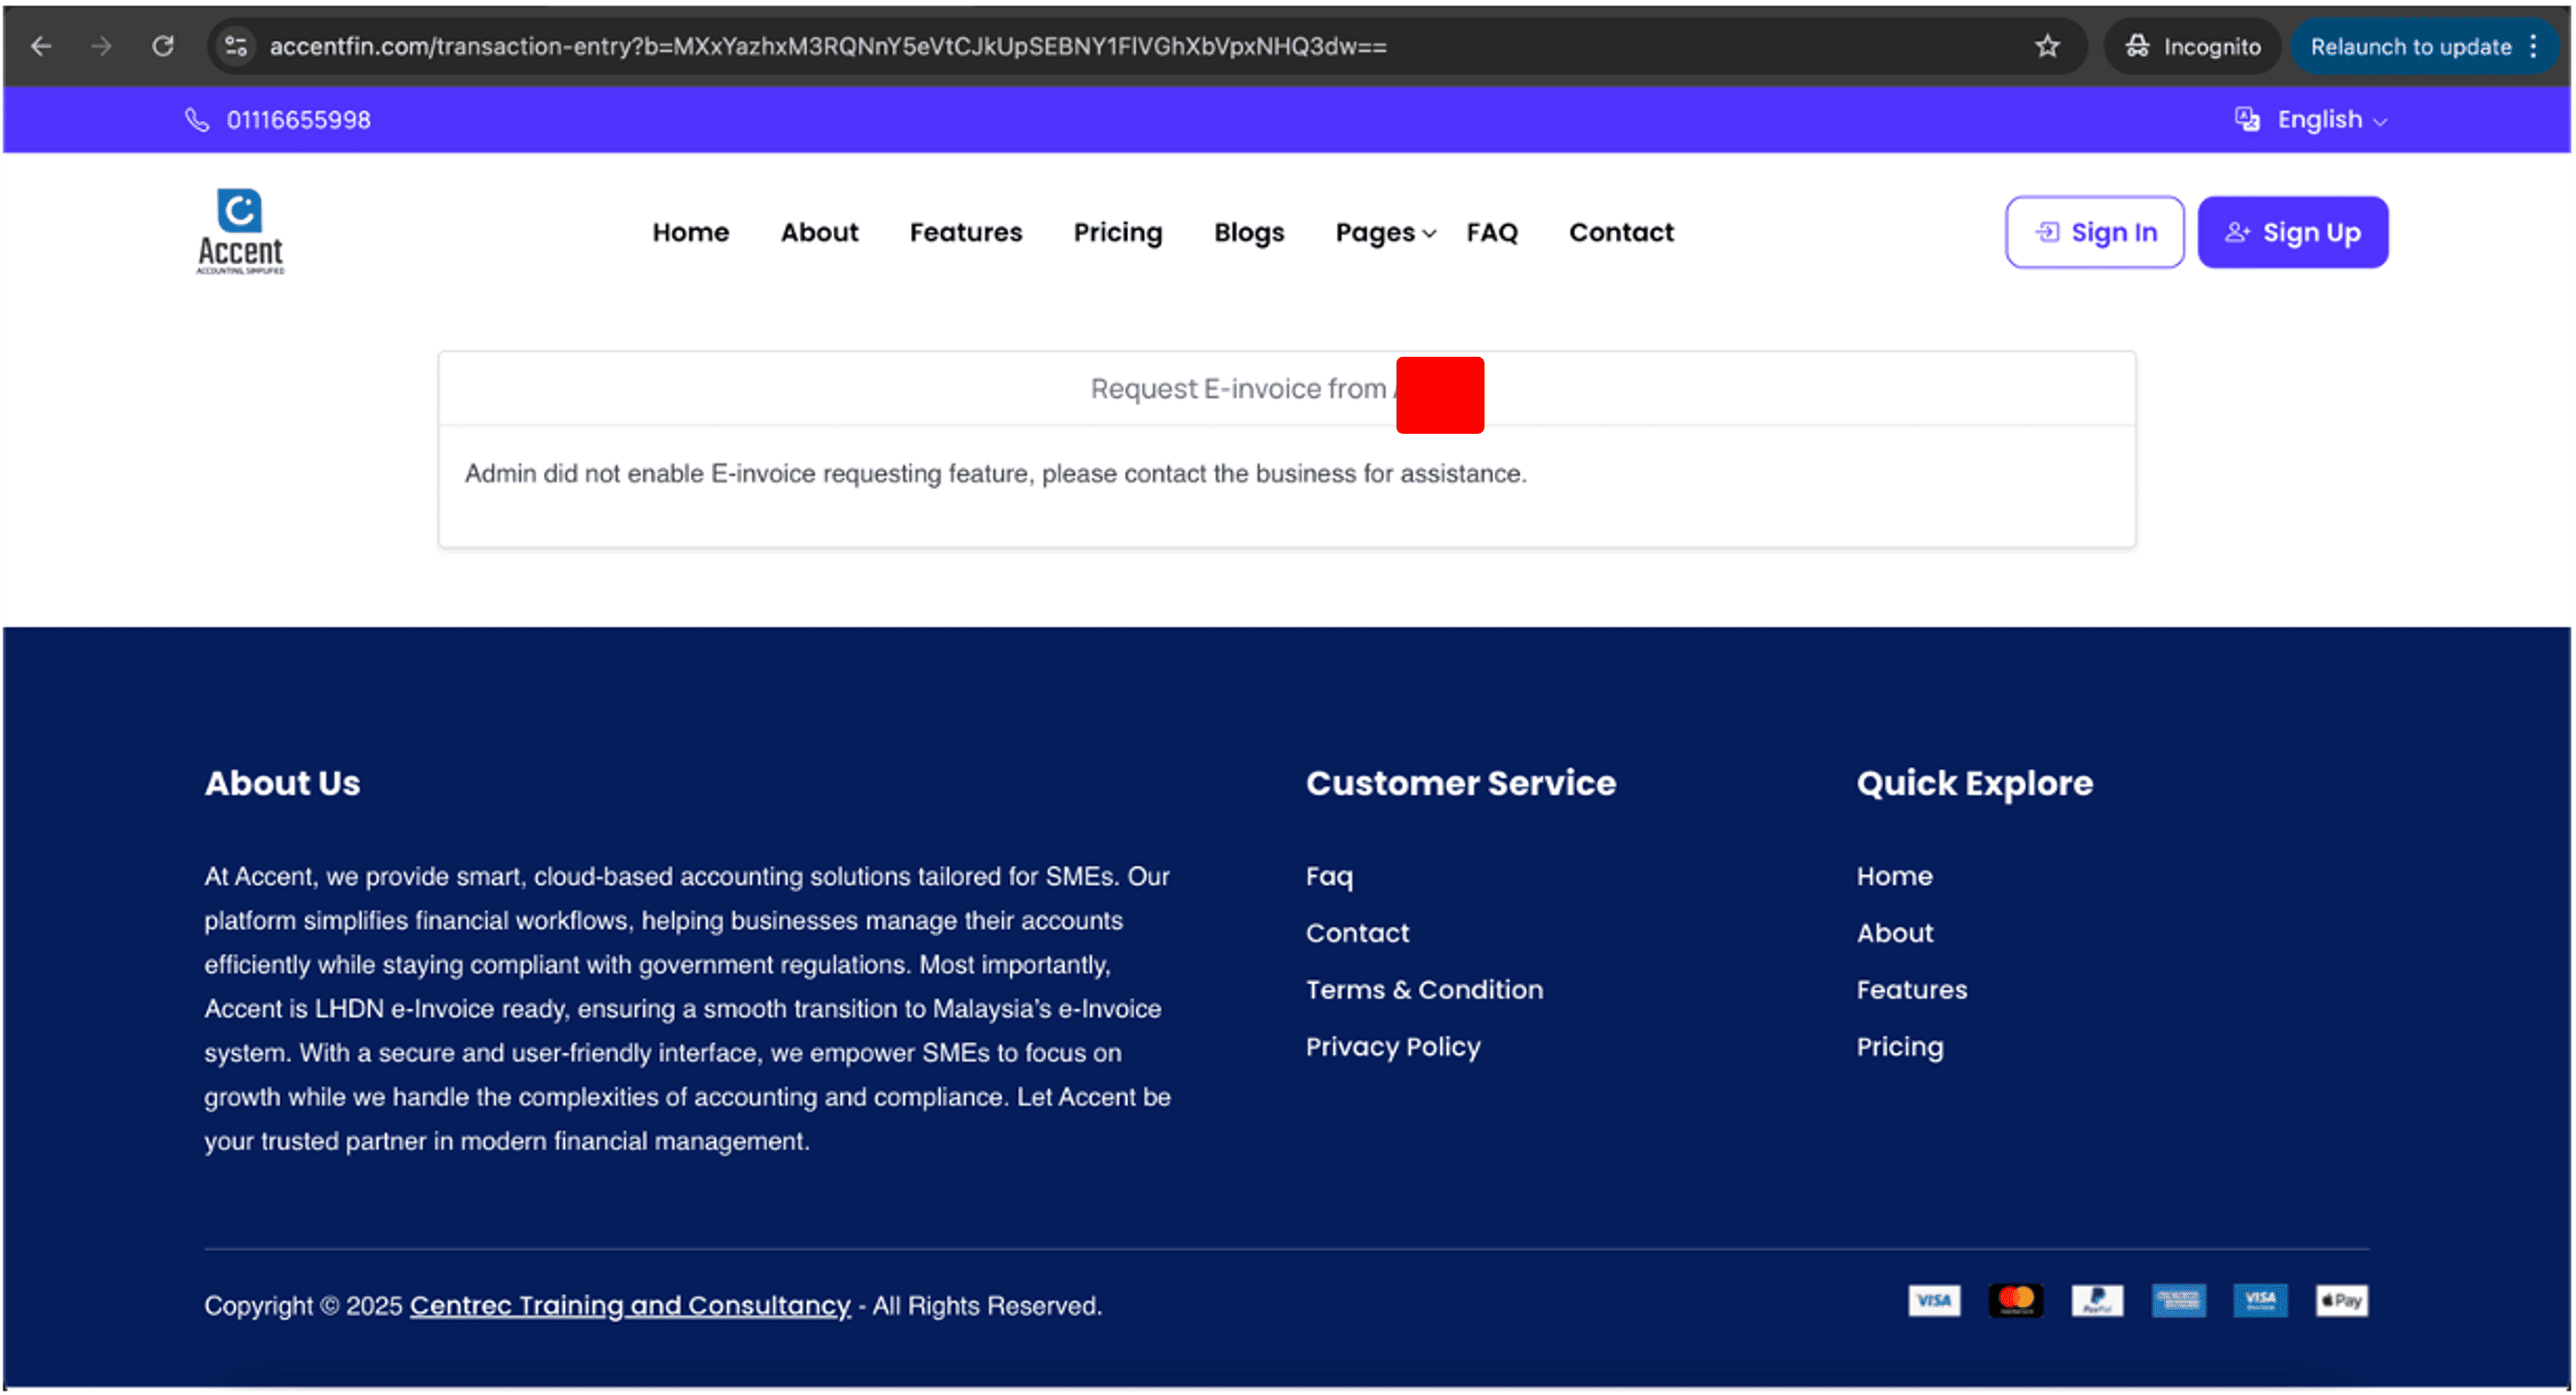
3. If you did not setup your Business Settings as mentioned on the above, your customers will not be able to request E-invoice from you (as shown in the screenshot below).
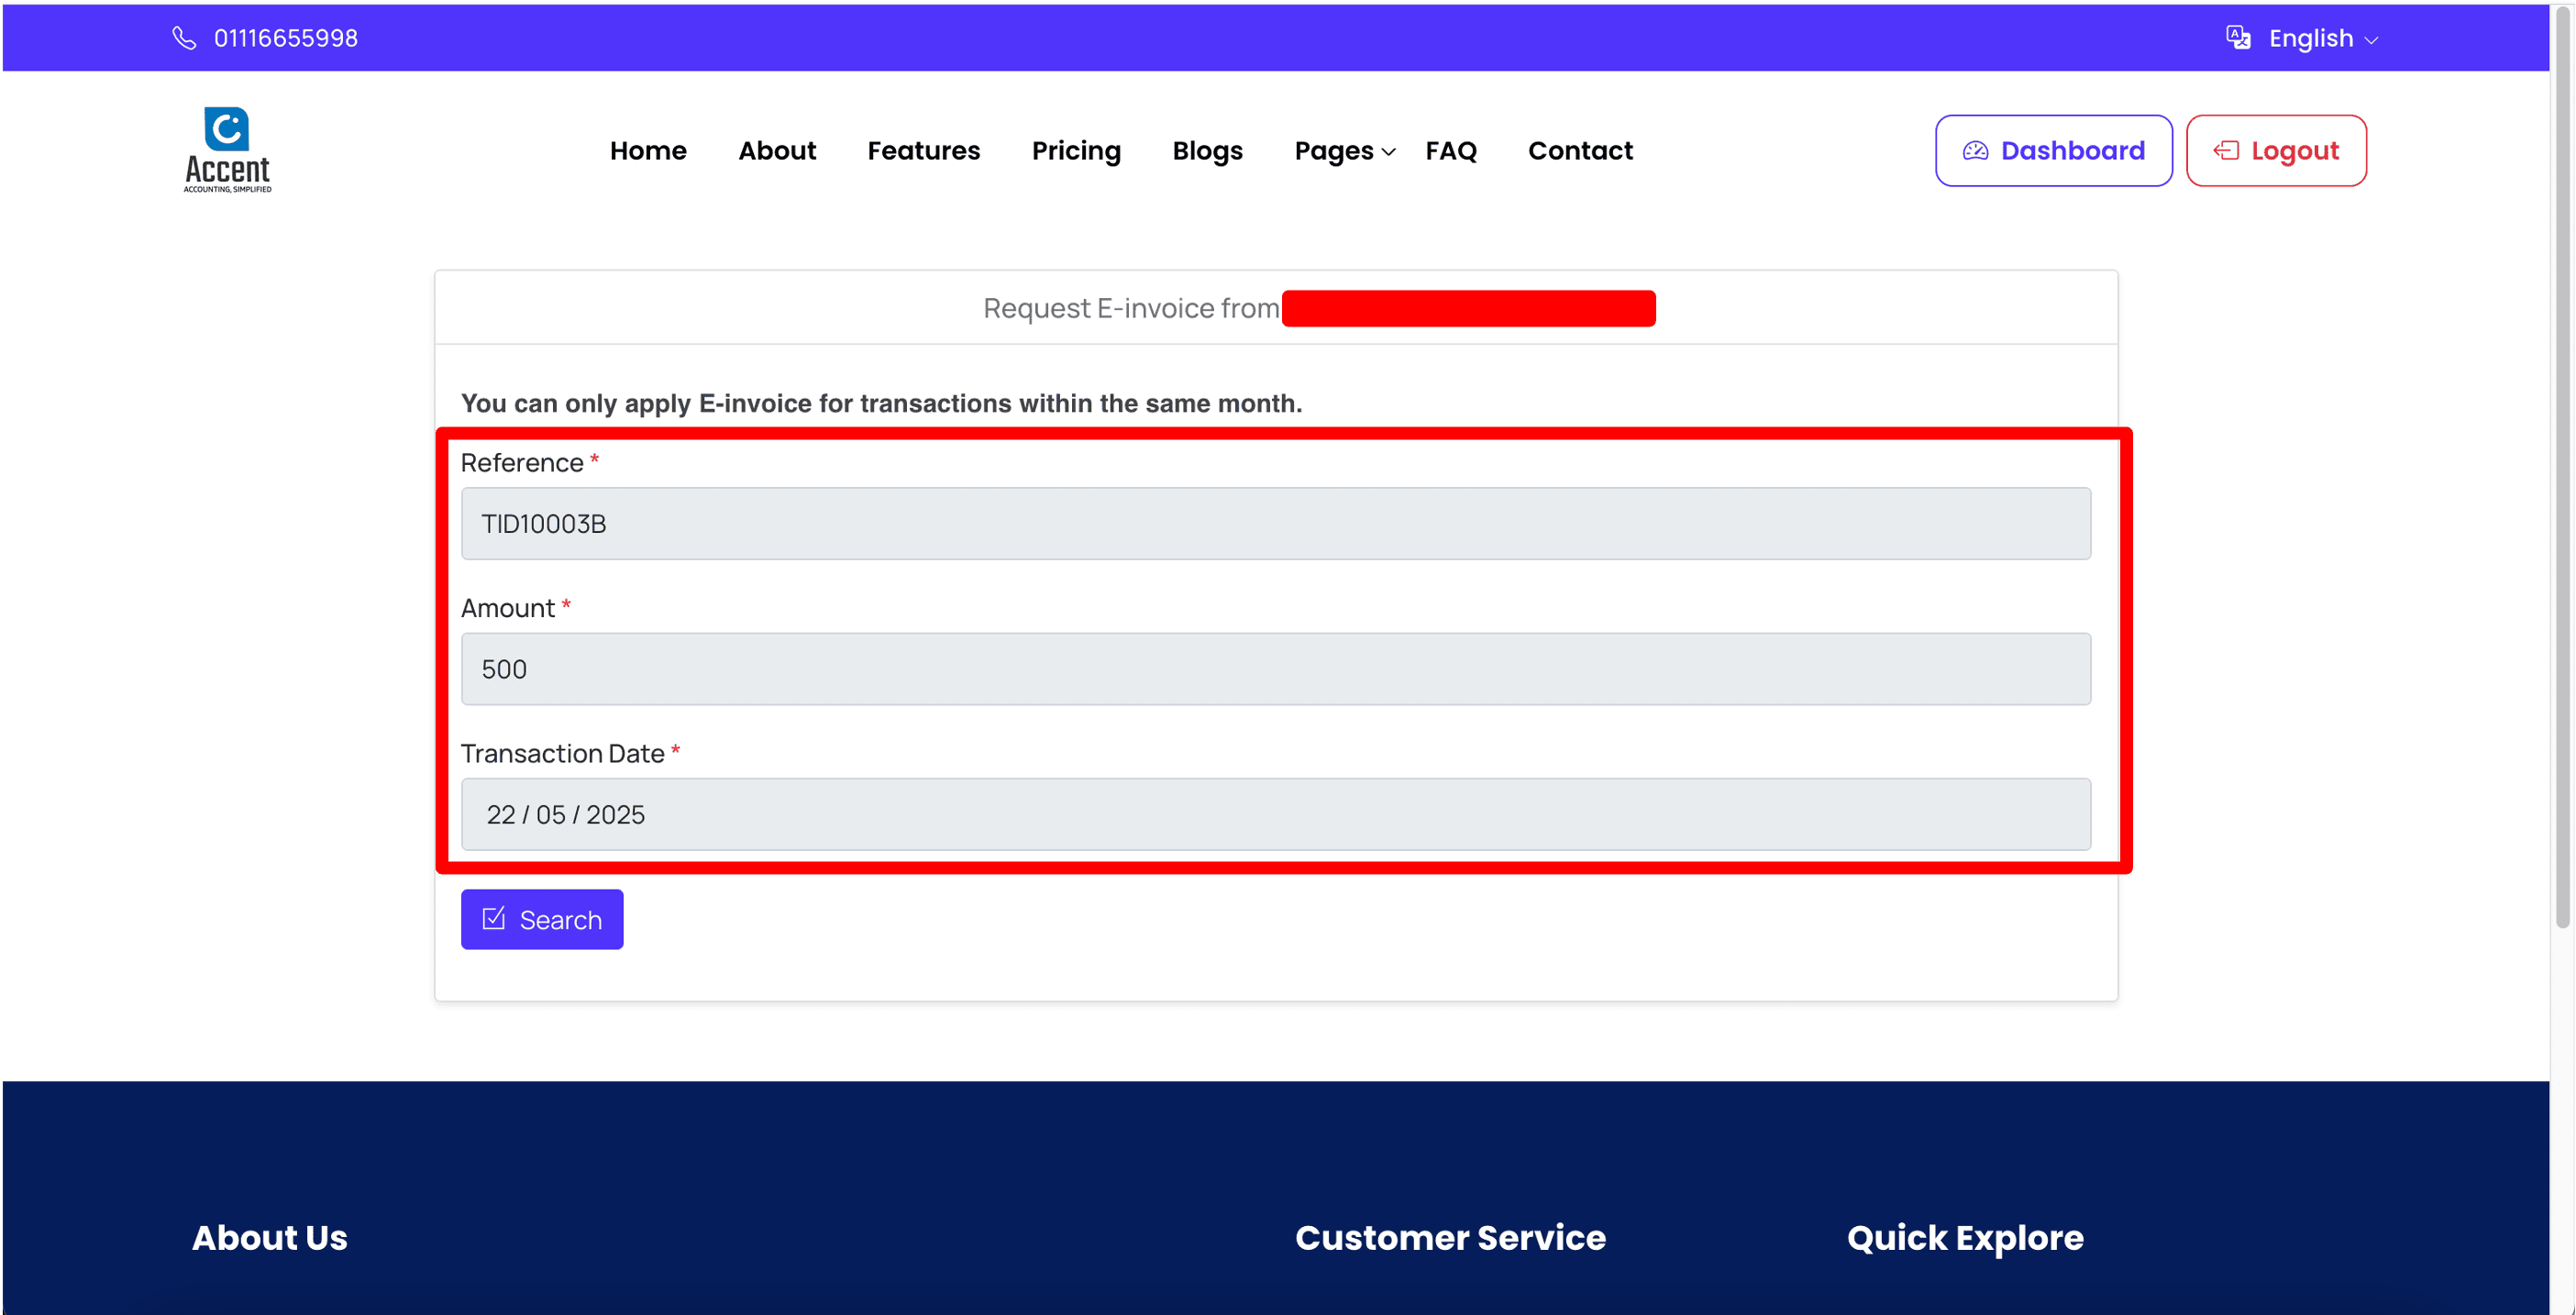
4. If you have setup the Business Settings correctly, your customers should reach the following page when accessing the E-invoice Requesting Form. Your customers are required to fill in the Reference (Transaction ID), the amount of the transaction and the date of the transaction in order to search for the matching transaction to convert as invoice. (Wrong details will end up with No Records Found error, this is to ensure only authorised personnel with correct details is able to access and request for E-invoice)
NOTE
Previously requested and converted transaction records will not be returned or matched.

SPECIAL NOTE (Updated on 22/05/2025)
To allow your customers to request E-invoice for a specific transaction record, please refer to the end of this tutorial (Section "How to enable customers to request E-invoice for specific transaction?")
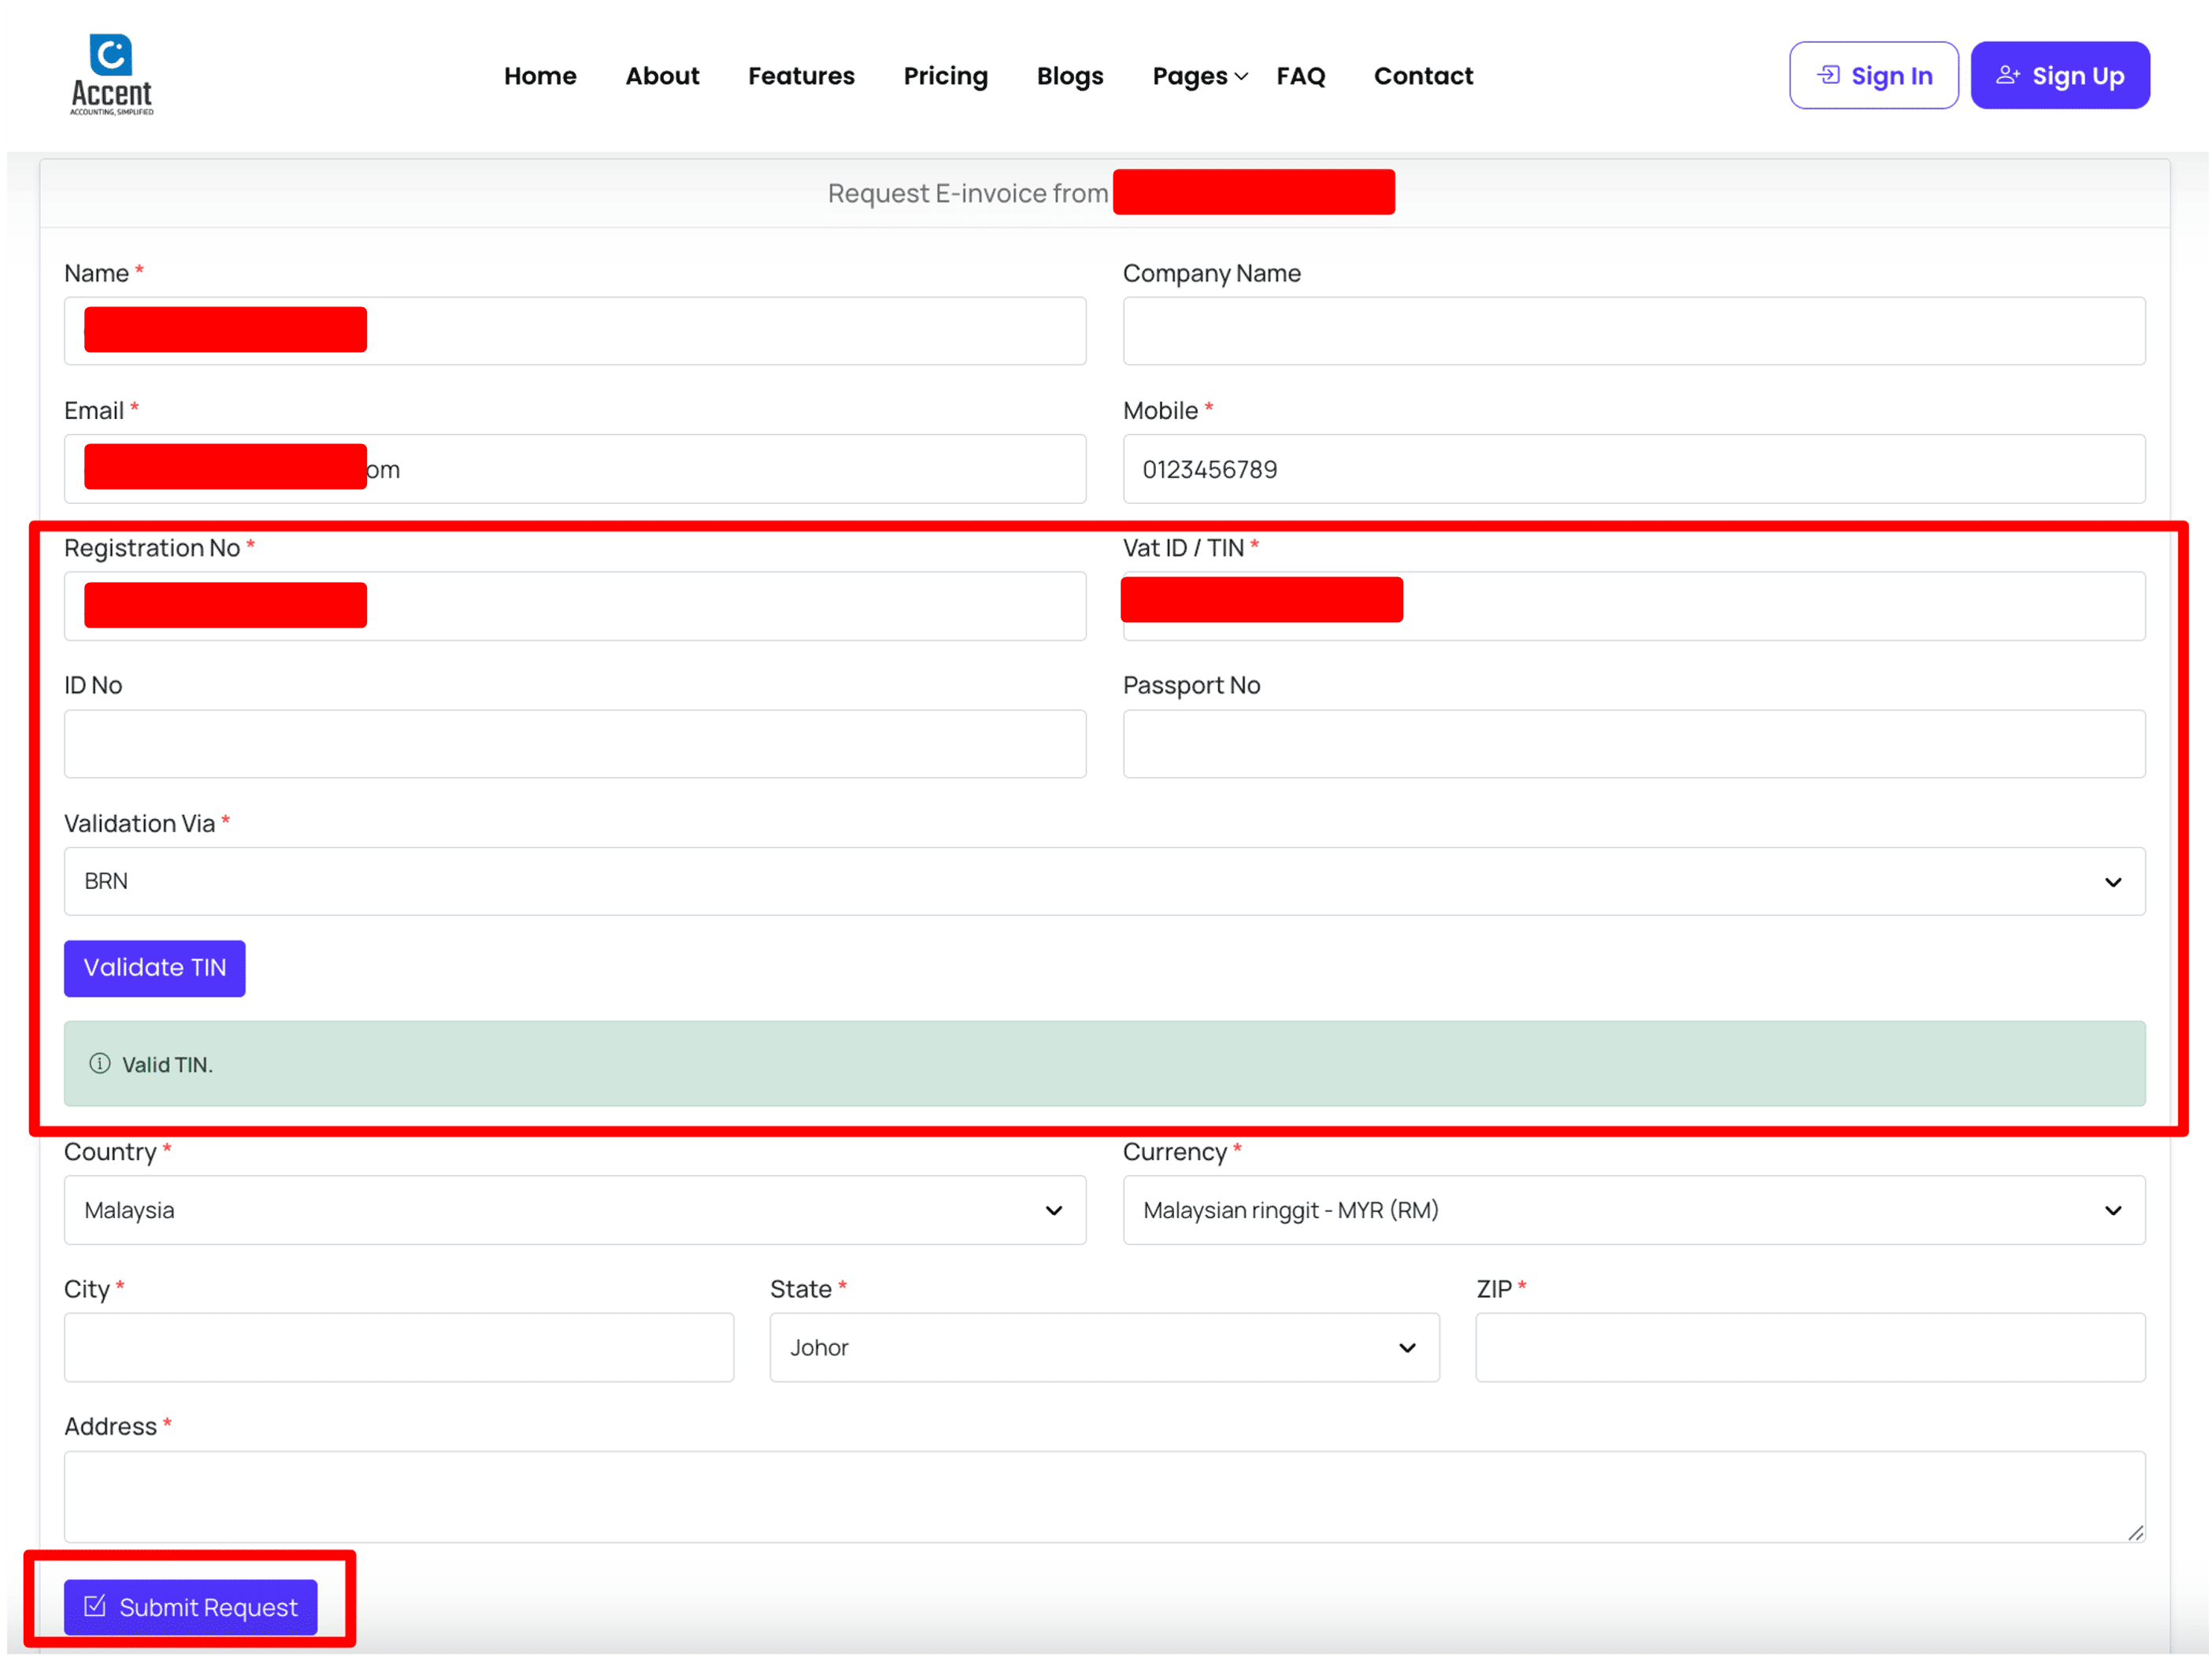
5. If a matching transaction is found, customers will be redirected to a form to fill in their details. These details are required by MyInvois Portal (LHDN server) to issue a valid E-invoice.
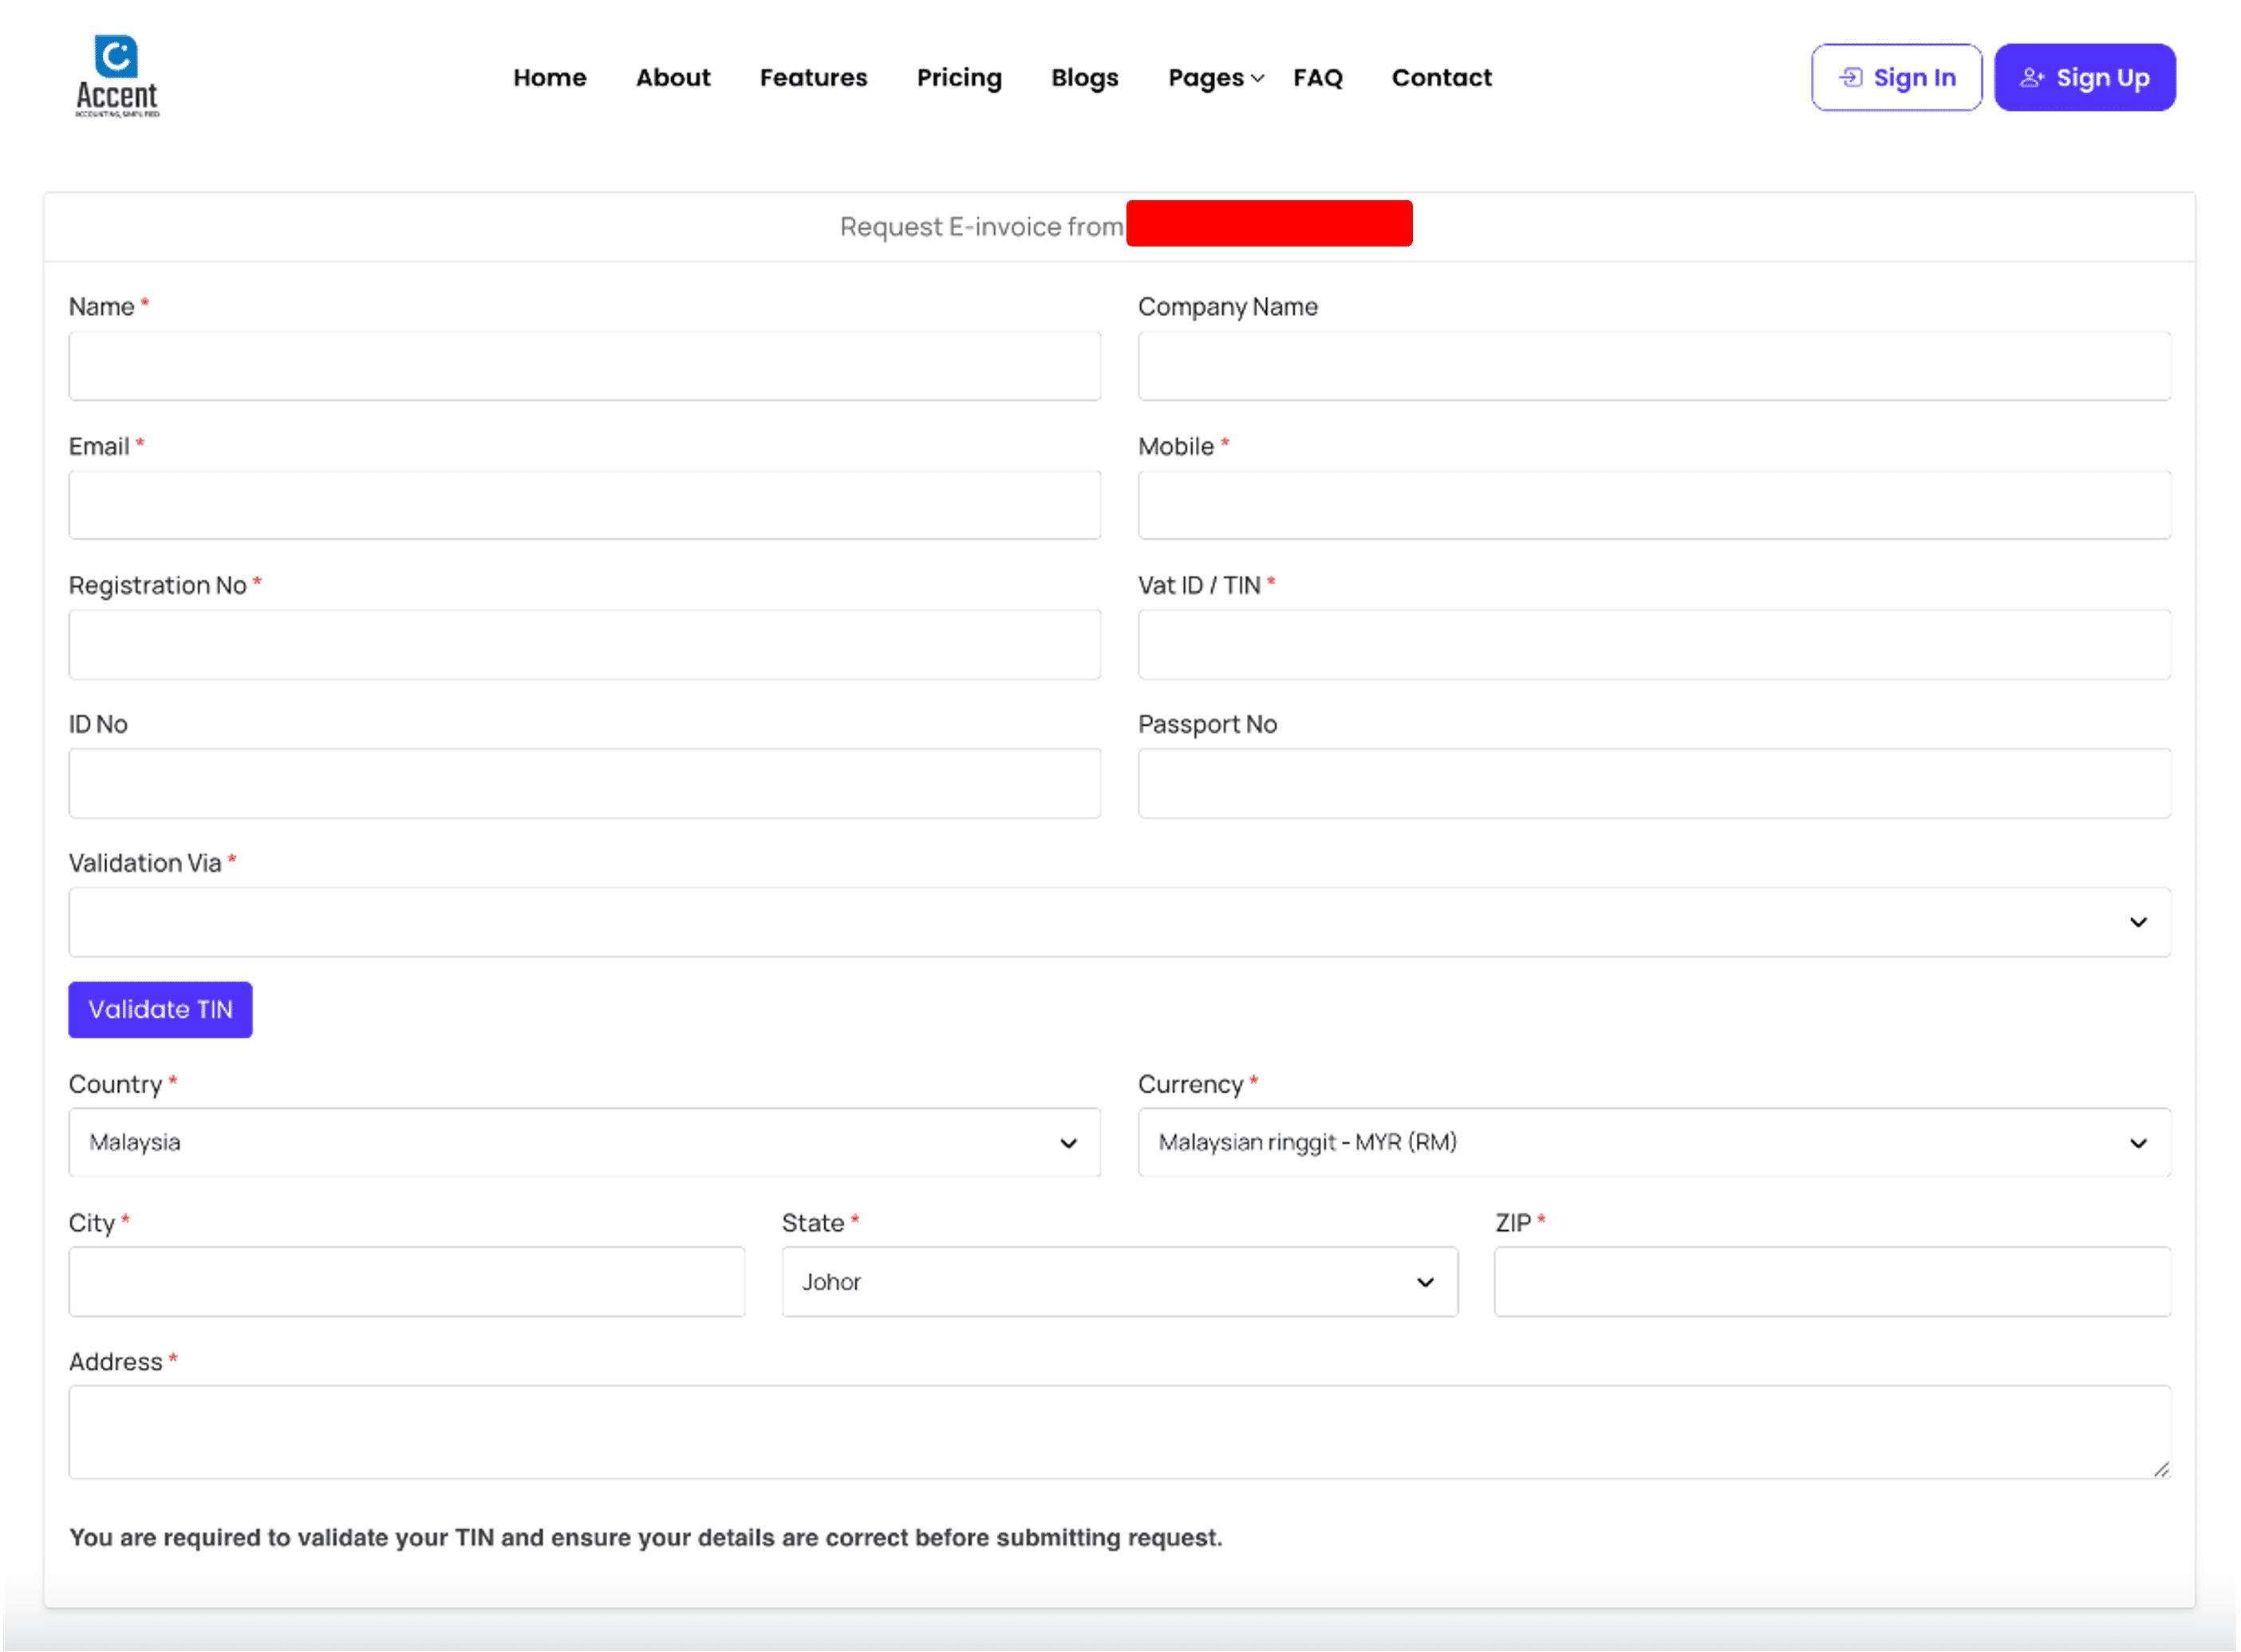
6. Customers must fill in the correct TIN number and also their details for validation, this is required by MyInvois Portal (LHDN server) to issue a valid E-invoice.
- Registration No: Refers to Business Registration Number in SSM (if your customer has a business and using their business identity to request E-invoice from you).
- ID No: Refers to customer's NRIC number.
- Passport No: Customer's passport number.
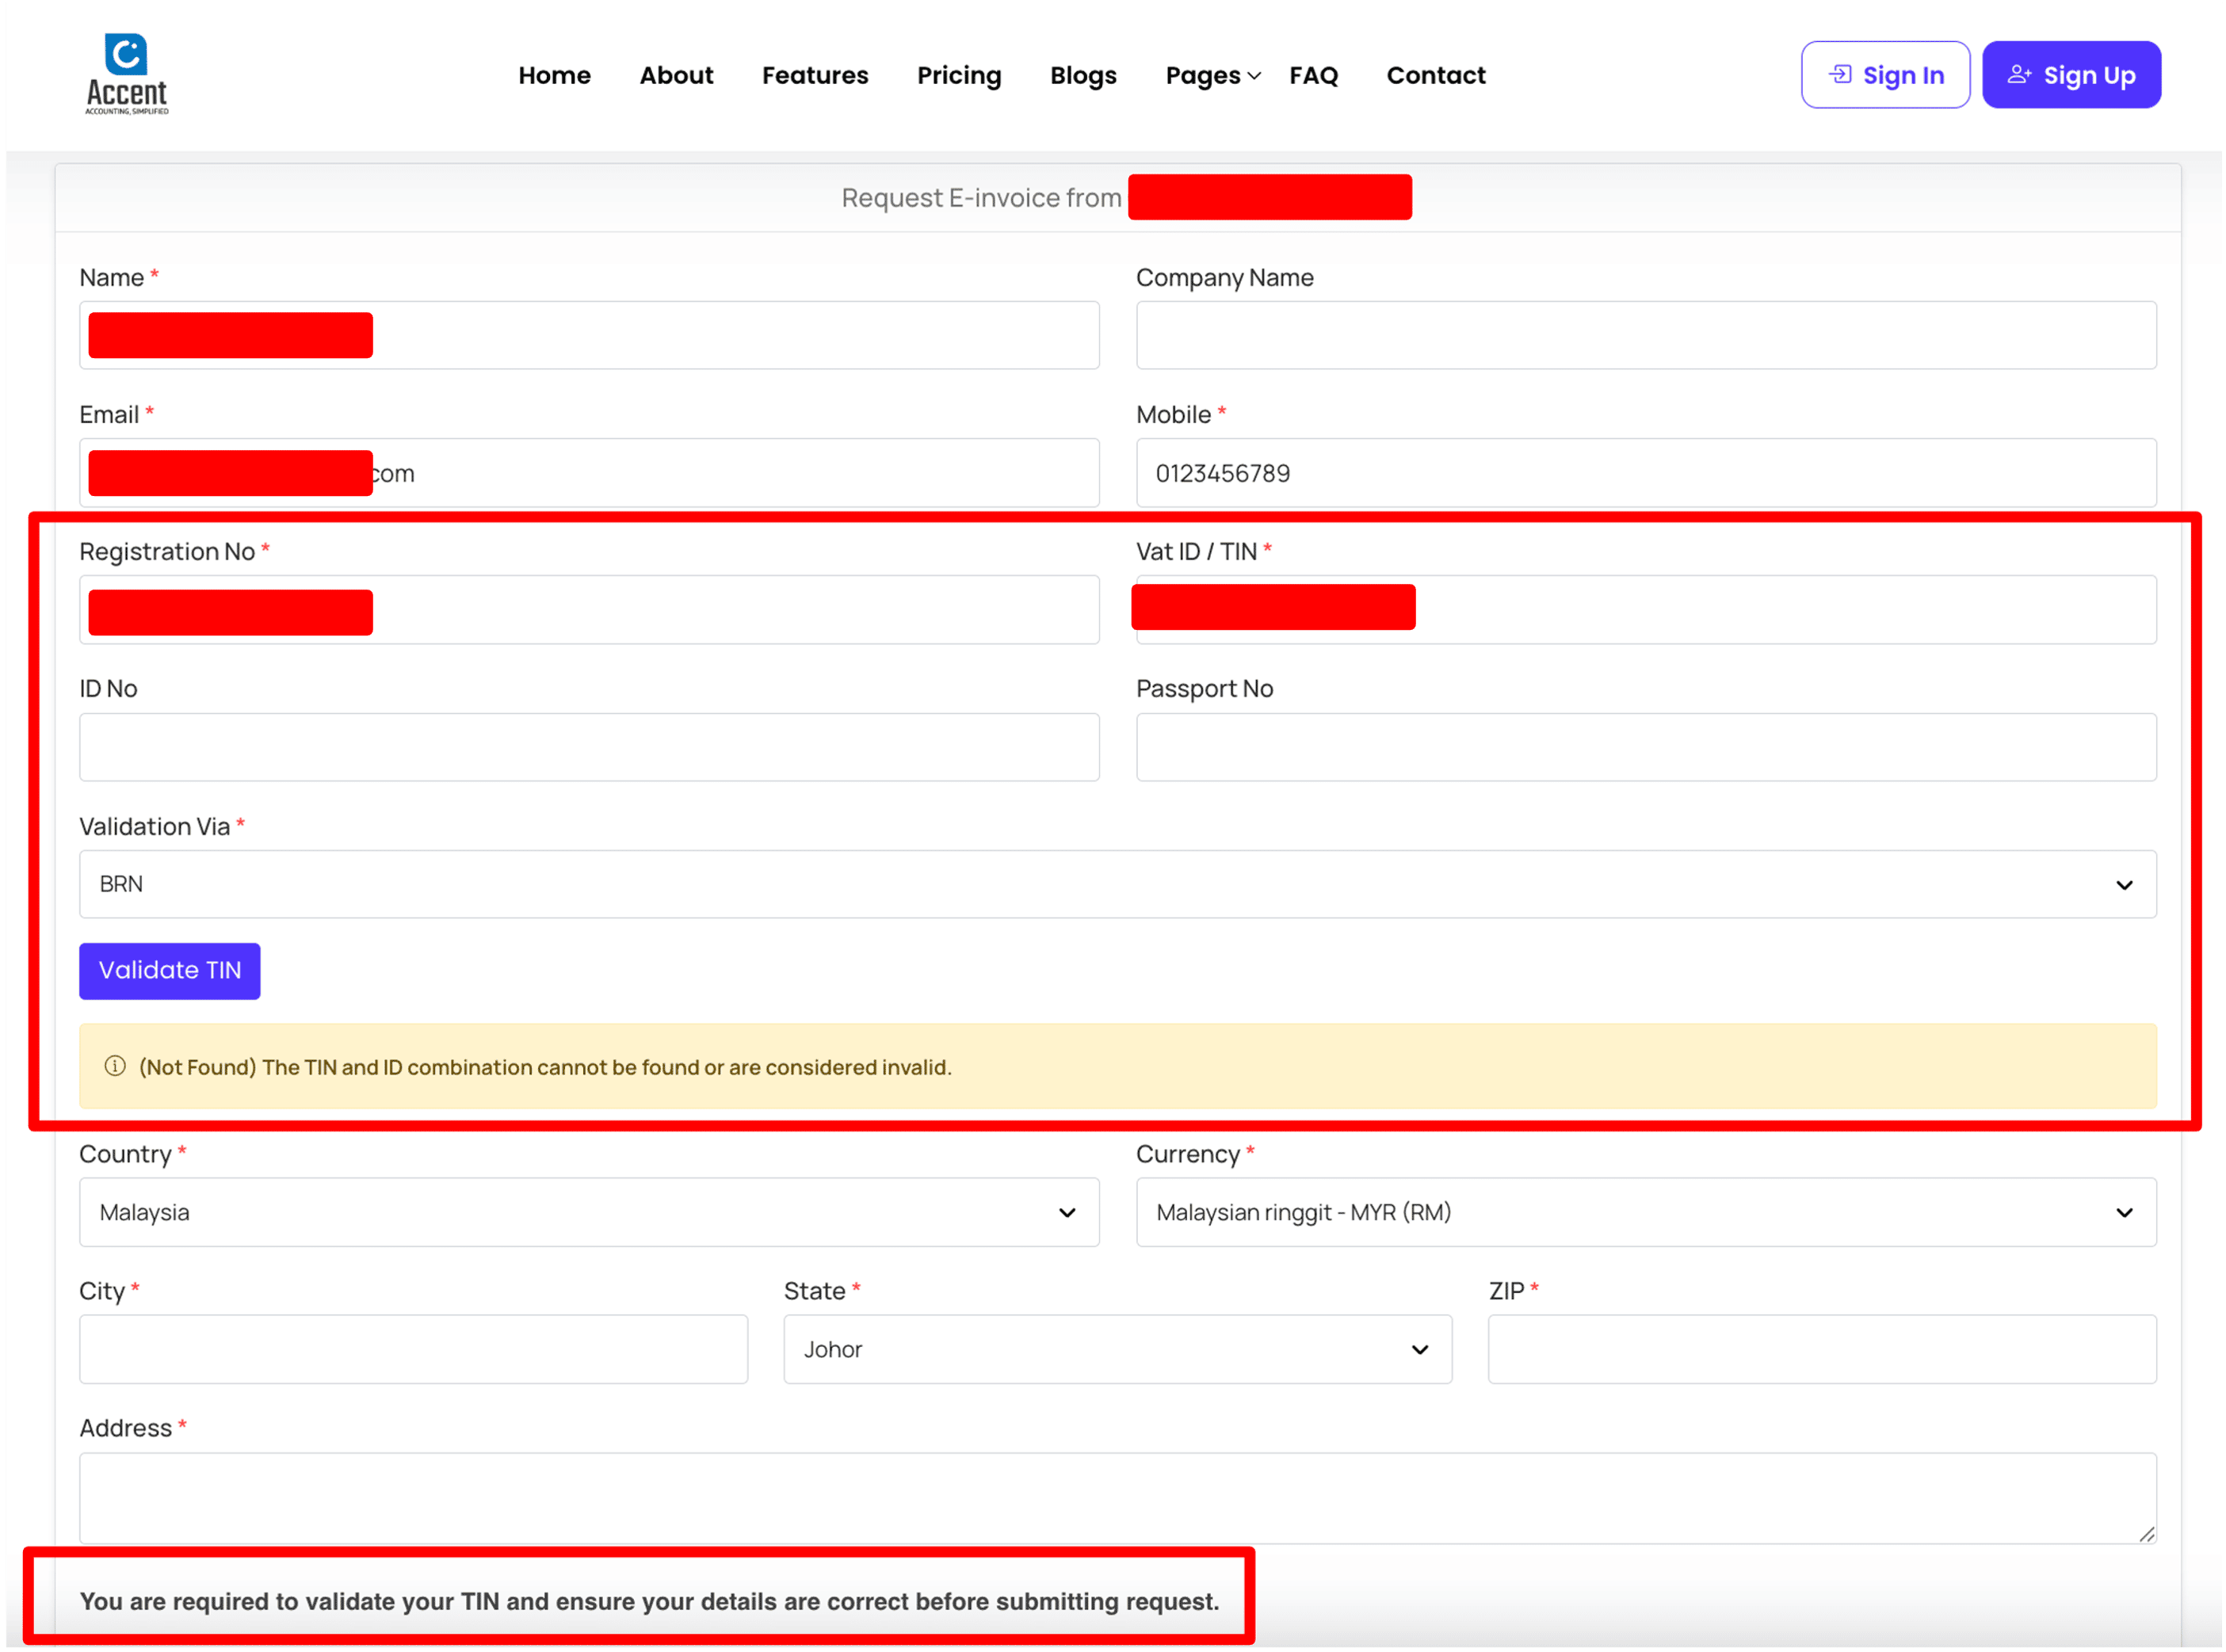
It is not compulsory to fill in all three details above, just choose to fill in one of it for validation with customer's TIN number. Select the validation method through the dropdown field Validation Via.
- BRN: Use Registration No to validate customer's TIN number.
- NRIC: Use ID No to validate customer's TIN number.
- PASSPORT: Use Passport No to validate customer's TIN number.
NOTE
The validation results are returned directly from MyInvois Portal (LHDN server), if the results are invalid, customers are not able to proceed to request E-invoice.
7. The following screenshot shows a successful validation results from MyInvois Portal (LHDN server). Once the TIN is validated successfully, customers can further fill in the remaining required fields and click on Submit Request.
The submission of invoice record to MyInvois Portal (LHDN server) might take up to few seconds in order for LHDN server to process the details.
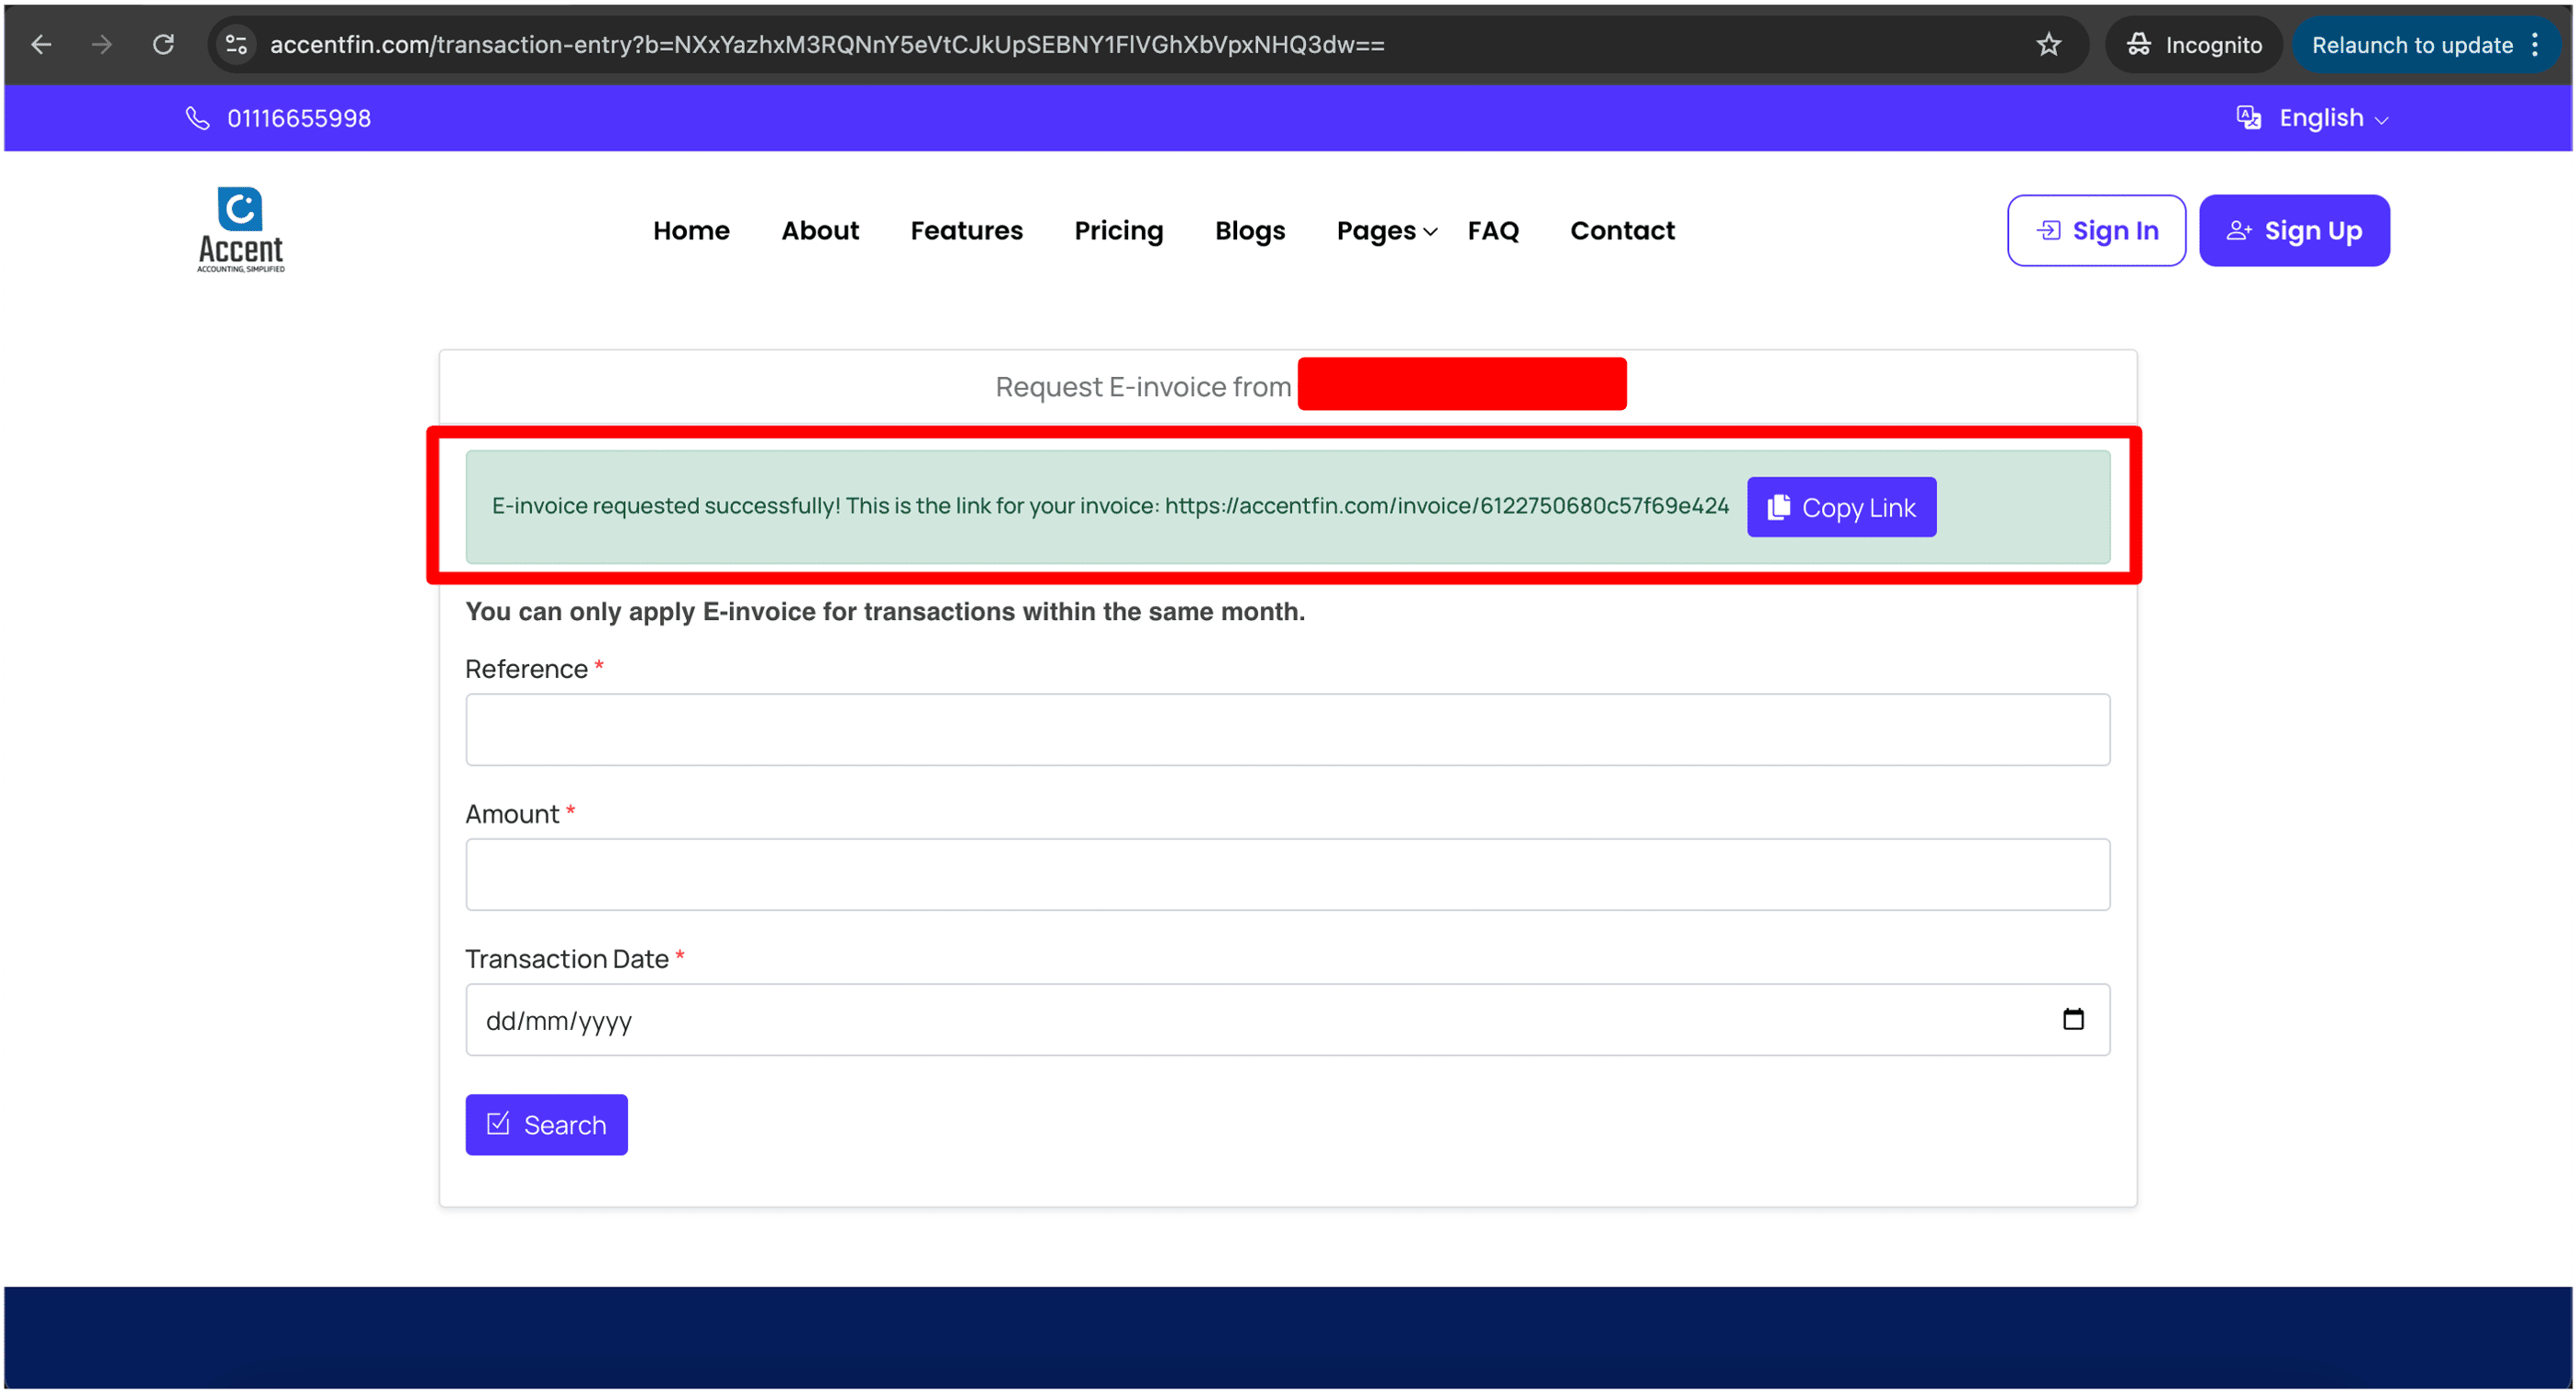
8. Finally, if the submission is successful, customers will be redirected back to the following page with the link to access their invoice.
How to generate QR for customers to scan to request E-invoice?
At this E-invoice requesting form page, click on Get Page QR button. Note that you must be logged in to view this button.
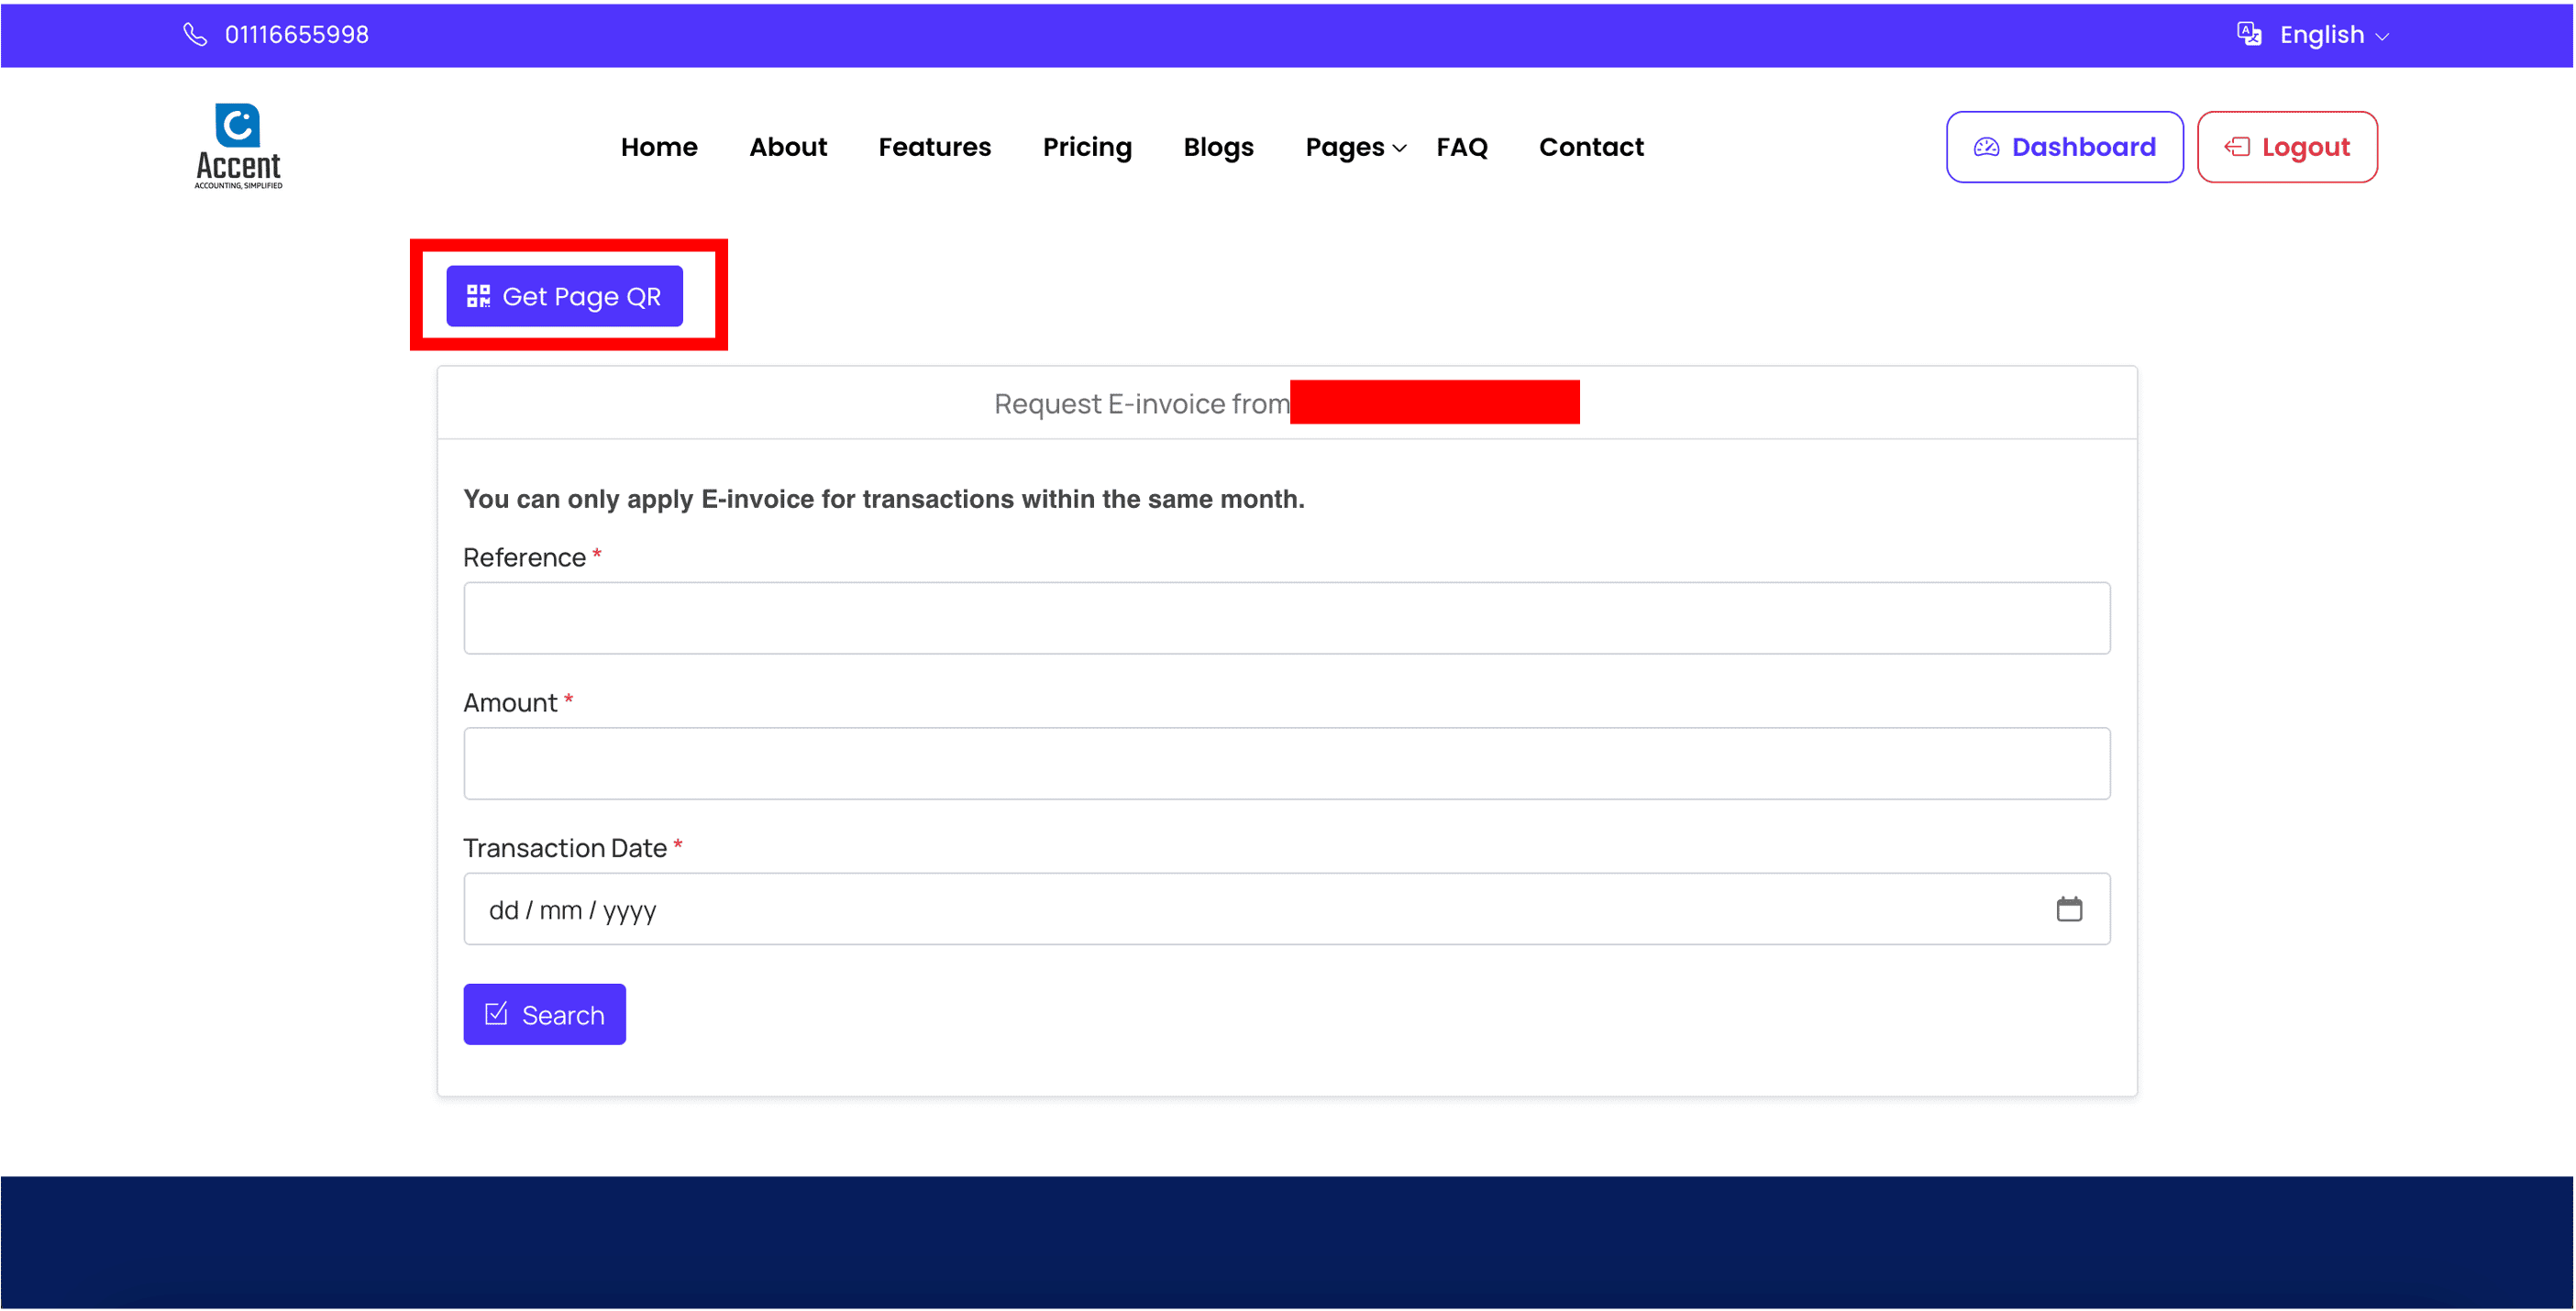
The generated QR displayed on the screen is the QR that you can share with your customers for them to scan to request for E-invoice. You may click on Print QR button to print the QR onto your receipt or any surface for your customers to scan. Note that additional adjustments might be required as different receipts or surfaces have various sizes and designs.

How to enable customers to request E-invoice for specific transaction?
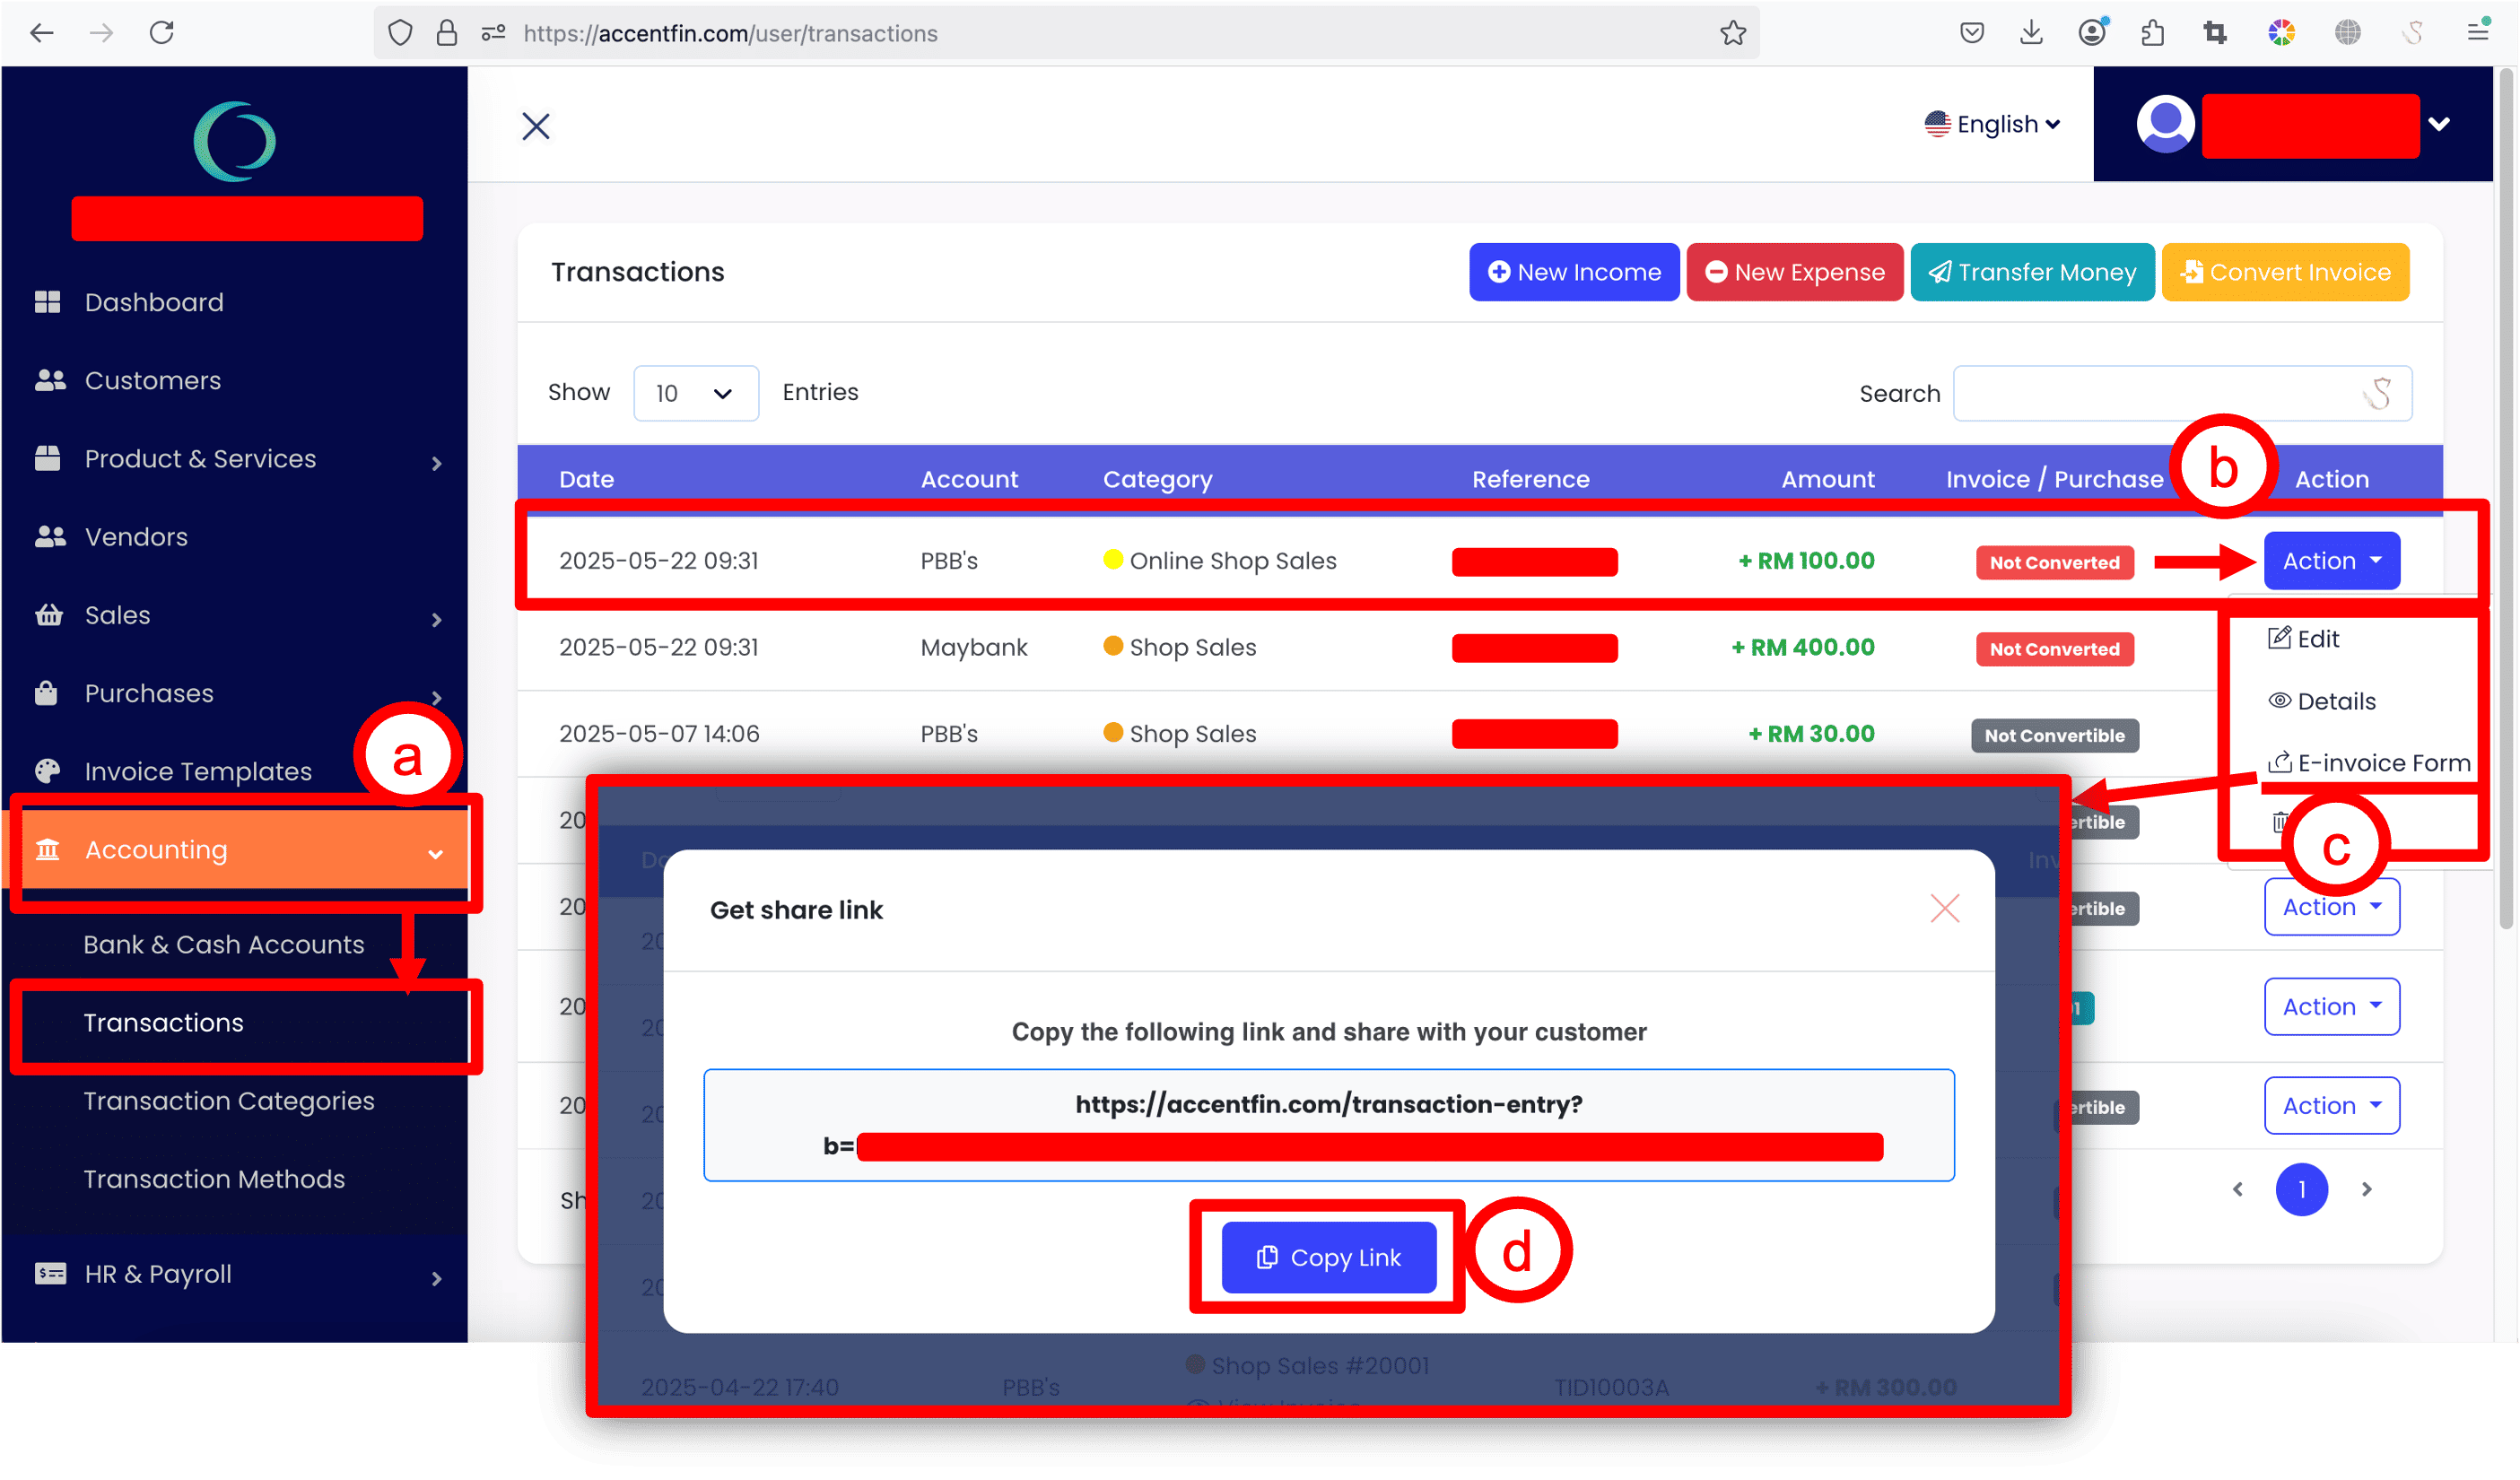
a. Proceed to Accounting > Transactions located at the side menu.
b. Find the specific transaction record that your customer requested, click on Action dropdown button.
c. Click on E-invoice Form.
d. A popup model will appear on your screen with a link to the E-invoice Request Form of that specific transaction record you've selected. Click on Copy Link and send to your customer.
After your customer receives the page link and opens it, your customer will be redirected to the E-invoice Request Form page (like the above screenshot), the details of the specific transaction record will be auto filled in, this way, your customers will not need to manually key in the reference number (transaction ID), amount and transaction date, this would save you and your customer's valuable time.
Your customer can directly click on the Search button to proceed to request E-invoice.
NOTE
If the transaction has been converted previously, or the transaction is not convertible, the button E-invoice Form will NOT appear, your customer will NOT be able to request E-invoice for the transaction.


LAST BUT NOT LEAST...
A very important reminder, please ensure you have setup your Business Settings correctly to enable E-invoice Requesting Form (as mentioned above in Step 1) and to enable E-invoice function for your business. Learn more on how to enable E-invoice function by visiting this link.
Comments (0)